Decadent Jamie Oliver Gluten Free Chocolate Cake

Sunday 12 December 2021


I was looking for a decadent gluten free birthday cake for my sister's birthday. She always has two. One for immediate family and the other for both parents, ours and her in laws. 

So this year being such a yucky year I decided to make a selfishly decadent gluten free cake which can also be a vegan cake all thanks to Jamie Oliver. 

The only reason it is a gluten free chocolate cake and not a vegan chocolate cake is because I accidentally got lactose free yoghurt, I swear I thought it was soy and I used normally margarine because I thought it would come out better.  

I will leave experimenting up to you. Either way this cake is ridiculously decadent and delicious. 

Enjoy.  


Decadent Jamie Oliver Gluten Free Chocolate Cake

Ingredients
300 g margarine (substitute dairy-free margarine suitable for baking) , plus extra for greasing
300 g gluten-free plain flour
300 g caster sugar
2 teaspoons vanilla extract
200 g lactose free yogurt  (substitute soy yogurt)
2 teaspoons gluten-free baking powder
70 g cocoa powder
6 tablespoons rice milk
100 g fresh strawberries
dairy-free dark chocolate (70% cocoa solids), to serve

Icing
200 g icing sugar
4 tablespoons cocoa powder
100g margarine (substitute dairy-free margarine)
2 tablespoons lactose free yoghurt (substitute organic soy yoghurt)


Method

Preheat oven to 190ºC/375ºF/gas 5. Grease two 20cm/8"inch cake tins with margarine, then line the bottom with baking paper and dust the sides with gluten-free flour.

In a bowl, beat the margarine and sugar for around 5 minutes, or until light and fluffy. Add the vanilla extract and yoghurt, then mix until combined.

Sift the flour, baking powder and cocoa powder into the bowl, then fold through. Add the rice milk and stir briefly until you have a nice, smooth batter.

Carefully divide batter between the cake tins, then place on the middle shelf of the hot oven for 45 minutes (SEE BELOW), or until an inserted skewer comes out clean. 

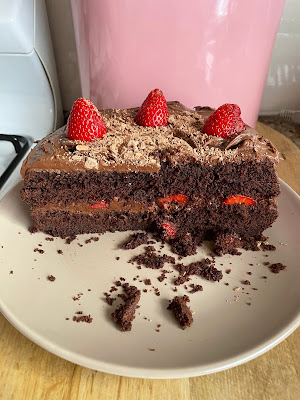
(The original recipe calls for 20-25 minutes but the cakes were raw! I actually cooked the cakes for 50 minutes but they came out a little dry so go for 40-45 minutes. The cakes need to be a little fudgy so a little raw. They will cook a little more as they cool down. A fudgy cake is nice to eat! Skewer doesn't need to come out clean. Experiment! )

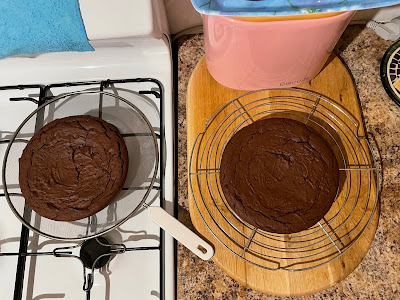
Leave to cool for 5 minutes, before turning the cakes out onto a wire cooling rack, then leave to cool completely while you make the icing.

Sift the icing sugar and cocoa powder into a large bowl, then add the margarine and beat until smooth. Stir in the yoghurt to combine.

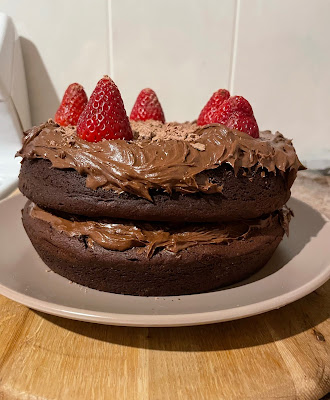
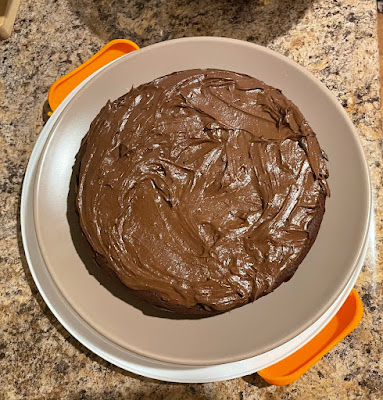
Once cooled, place one of the sponges on a plate or cake stand. Carefully spread half the butter icing on top.

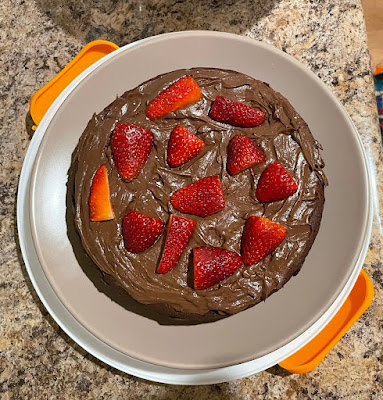
 then scatter over most of the strawberries. 

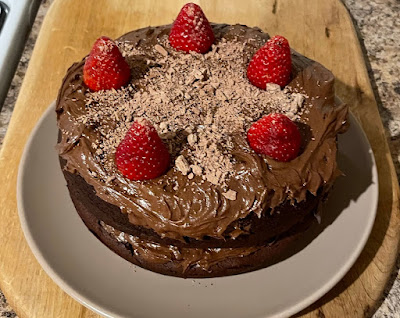
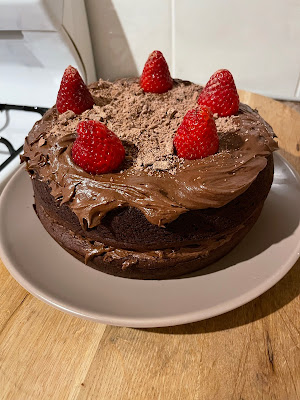
Sandwich the second sponge on top and press down lightly, then carefully spread the remaining icing over the top and finish with a scattering of strawberries and a few shavings of chocolate. I used a small flake. 


Find the original Jamie Oliver Vegan Chocolate Cake Recipe Here


Green Gluten Free Chocolate Birthday Cake

Thursday 16 September 2021


Gluten Free Chocolate Birthday Cake

I made this gluten free chocolate cake for my nephews 9th birthday.  He loves dinosaurs so I added some green food colouring and chocolate dinosaurs. 

The dinosaurs I made myself. I bought a chocolate mold with dinosaurs and just melted some chocolate and out popped the dinosaurs. I also made the stars too and added some hundreds and thousands.

With the dinosaurs I made some with white chocolate and added some food colouring to it.  I filled them with caramel which he loves too. 

I went out of my way to watch some YouTube videos which showed me how to do this and he didn't like the taste of the chocolate or the caramel inside. Well that is the last time I go out of my way! hahahaha. 


 Gluten Free Chocolate Birthday Cake

1 ½ cups white granulated sugar
2 cups plain gluten-free flour  
¾ cup cocoa powder    
1 ½ teaspoons gluten-free baking powder    
1 ½ teaspoons (8g) bi-card soda/baking soda
1 teaspoon salt
2 large eggs (110g), room temperature
1 cup lactose free milk (or dairy-free milk)
½ cup vegetable oil (or oil of choice)
1 ½ teaspoons gluten-free vanilla extract
¾ cup boiling water (for activating the cocoa)

For the icing:
½ cup 115g margarine (or dairy-free butter)
1 ½ teaspoons gluten-free vanilla extract
4 ½ cups icing sugar/powdered sugar
¼ cup lactose free milk (or dairy-free milk)

Centre of cake
1 cup Nestle Caramel Top N Fill
1 cup of icing sugar mixture from above


Instructions

Preheat oven to 180°C (350°F).  Grease a 25cm/10 inch silicone cake mold in the shape of number 9.

In a large mixing bowl, stir together sugar, flour, cocoa, baking powder, bi-carb of soda and salt until they are smooth and combined.

In a medium sized bowl mix together eggs, milk, oil, and vanilla. 

Pour the wet ingredients into the dry ingredients and beat with a mixer on medium speed for a few minutes.

Stir in boiling water. ( I forgot this step!)

Spoon into silicone mold. Place mold onto a baking try and into oven and bake for 45-50 minutes checking a few times towards the end in case cake burns. 

If you find the cake is burning on top but is not cooked inside cover with foil and place on bottom rack. Once a toothpick inserted in the center comes out clean remove from oven and let cool in the pan for then remove from pan and let cool on a rack.


Centre of Cake

I sliced the cake in half and on one side I buttered with icing sugar and on the other side I buttered with caramel sauce then I sandwiched together. One side did break in half but that is ok because once you ice the cake you won't know the difference! Looks brand new.   


For the icing

In a medium mixing bowl, beat margarine and vanilla until smooth and creamy. Gradually add icing sugar, one cup at a time. Slowly beat in milk. Add a drop of green food colouring.

Beat in additional milk and margarine if needed, to obtain desired consistency.   

Enjoy!


Original recipe is from Gluten Free Palate


Gluten Free Steamed Treacle Sponge Pudding

Monday 16 August 2021


Gluten Free Golden Syrup Steamed Pudding
 
Easy Gluten Free Steamed Treacle Pudding   


Gluten Free Steamed Treacle Pudding
 
Gluten Free Steamed Treacle Sponge Pudding 
 

I made this wonderful gluten free steamed treacle pudding because I am currently reading a book that is set in the 1940's. In this book a treacle pudding was mentioned so lovingly that I had to look for the recipe and make it.  


Of course the recipe had to be from an English source as a steamed treacle pudding is very British and I searched and found this one.


I changed it to be a gluten free recipe and it works wonderfully.


Make sure the margarine and eggs are room temperature as they will curdle. It happened to me! The way to fix it is add some flour a little at a time until it smooths out a bit then add the milk and it's back to normal. 


I also found that most of the syrup didn't get absorbed by the pudding so it looks like a giant creme caramel hahah. I don't know why this happened but the gluten free steamed pudding was still incredibly moist and delicious.  


My pudding basin was also a 2 litre so I didn't need to put any baking paper, foil and string which seems such a chore. 


I have kept these details in the recipe in case you pudding steamer is the right size. Since most have lids is this even necessary any more. I don't know. I'm just trying to be helpful. 


If you are looking for some lovely light on the tummy comfort food you have found it. Enjoy. 


Gluten Free Steamed Treacle Pudding

Ingredients
150 gm margarine room temperature, plus extra to grease
125 ml golden syrup
25 gm caster sugar
2 large eggs room temperature
150 gm gluten free self-raising flour
½ tsp fine sea salt
100ml Zymil lactose free milk


Method
Generously butter a 1.2-litre pudding steamer. Lay out a large sheet of foil and top with a sheet of baking paper. Butter the paper, then fold both layers to make a pleat in the centre. (Lots of YouTube videos to show you how to do this). This will cover the pudding steamer.


Pour 125ml golden syrup into the base of the pudding bowl.


Cream 150g margarine and the sugar together in a mixing bowl until they are light and fluffy. Beat in the eggs, then sift in the flour and salt and mix again. Add the milk and mix until nice and smooth.


Then dollop this mixture on top of the syrup in the pudding steamer. 


Cover with the baking paper and foil, buttered paper-side down. Tie securely with string, making a handle to easily lift the basin. Trim the excess paper and foil to prevent water getting into the pudding as it steams. (Once again lots of YouTube videos to show you how to do this).


At the bottom of a large deep pot place a small upturned saucer or a trivet then place the pudding steamer on top. Fill pot so steamer is covered halfway with boiling water. Top up every 30 minutes and steam for 1½ hours. 


A skewer placed into the centre (through the coverings) should come out without any sticky sponge crumbs.


Remove the foil and baking paper coverings and place a large plate on top of the steamer. Turn out and serve with custard or cream or just enjoy with the lovely extra syrup flowing down the sides.


Original recipe is from Sainsbury Magazine UK

Easy Gluten Free Banana Bread

Friday 30 July 2021

gluten free banana bread recipe australia
 
Easy Gluten Free Banana Bread

Gluten Free Banana Bread


I made this gluten free banana bread because I had two ripe bananas and I didn't want to throw them away so I made this delectable dessert. 


This is a lovely, light and moist gluten free banana bread. So easy to make and even easier to eat. It will be gone before you know it. 


For the sugar I used a mix of white sugar and raw sugar. Since I used the fork to mash the bananas I kept it to stir all the ingredients for the cake. 


I didn't have all the self raising flour I needed so I used a cup of plain gluten free flour and added a teaspoon of baking powder. It did the trick.


Just use what you have it almost always works out in the end hahaha. 


Try and have all ingredients at room temperature. I think this is why my bread has a little sunken tummy in the middle. Oh well still tastes great. It's always in the taste. 


Enjoy.


Super Easy Gluten Free Banana Bread


Ingredients

2 very ripe bananas mashed
⅓ cup melted coconut oil or dairy-free margarine
1 teaspoon bi-carb soda (baking soda)
1 ½ cups self raising gluten-free flour
Pinch salt
¾ cup granulated sugar
2 large eggs room temperate 80gms each, beaten
1 teaspoon pure vanilla extract
1/4 teaspoon cinnamon


Method

Preheat the oven to 180C (350° F).
Grease a 13cm x 23cm loaf pan with dairy free margarine.
In a mixing bowl, mash the ripe bananas until smooth. Since I used a fork to mash the bananas I kept it to mix the whole cake. 
Next add bi-card of soda to banana mix and stir until dissolved.
Stir in the melted butter coconut oil then add sugar, salt, eggs, vanilla extract and cinnamon.
Pour the batter into a greased loaf pan and bake on center rack for 50 minutes to 1 hour or until a toothpick inserted in the center comes out clean.
Best enjoyed warm so as soon as you can, place the gluten free banana bread on a rectangular dish and start slicing. Enjoy!
Store in an air-tight container. 


Original recipe from Mama Knows Gluten Free.

Gluten Free Pistachio, Lemon and Almond Cake

Saturday 27 February 2021


I found this zesty gluten free recipe in the weekend paper. It was originally a pistachio cake but when I went to buy the nuts I almost passed out at the price hahahah. Wow are pistachio expensive so this turned into an Gluten Free Lemon and Almond Cake with pistachios as topping. Enjoy.


Gluten Free Pistachio, Lemon and Almond Cake


Ingredients

150gm vegetable margarine

3 large eggs

100gm caster sugar

1 teaspoon vanilla extract

1 teaspoon lemon extract

2 heaped tablespoons Greek yogurt

Zest from 3 large lemons

400gm ground almonds


Icing

150gm icing sugar

25ml freshly squeezed lemon juice

2 heaped tablespoons chopped pistachios to decorate

Lemon zest from lemons above 


Method

  1. Preheat oven to 180C (160C fan)
  2. Take a large square of baking paper scrunch it up then smooth out and use to line 20cm springform tin.
  3. Melt the margarine in a small saucepan then remove from the heat and let cool.
  4. Put eggs, sugar, almond meal, yoghurt, vanilla and lemon extract and most of the lemon zest (hold some back for decorating the cake).into a bowl and beat with electric mixer until well combined.
  5. Finally beat in the butter.
  6. Pour the batter into cake tin and bake for 45 minutes until golden brown on top and springs back to a light touch.
  7. Allow to cool completely before putting on a serving plate.
  8. Mix together the icing sugar & lemon juice until smooth and pour over the cake.
  9. Decorate with chopped pistachios and the withheld lemon zest.
  10. Enjoy!


Related Posts Plugin for WordPress, Blogger...

Sia's Cooking Blog Designed by Ipietoon Blogger Template