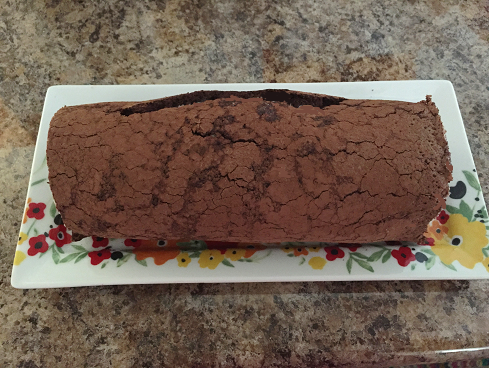
Gluten Free Lemon Blueberry Poke Cake

Tuesday 27 September 2016


This is a recipe I found in the latest Coles Magazine. The original is not gluten free. I just changed the flours around and a few more ingredients and came up with a winning cake. 

The cake itself came out a bit custardy but that doesn't detract at all. There is a strong lemon flavour which gives the cake a lot of zing but I think this is why everyone loved it so much.

I have to warn you that this is a very time consuming cake. It takes all day. I think if I make it again I won't bother with the butter cream. There was a lot of blueberry sauce left over so before I put the buttercream on I covered the cake in the sauce.  Next time I will leave it at just that.

For some reason I also fluffed up the icing because it looked a bit plain with the cream flattened on top. I think this made it look a bit messy. Next time I might blob on the left over blueberry sauce if I decide to use the buttercream.

This is a very summery cake so perfect for the season. If you love lemon flavours you will love this lemon cake. Delicious.

Gluten Free Lemon Blueberry Poke Cake

Ingredients
150g olive oil margarine, softened
1 cup raw sugar
2 free range eggs
300 ml lite coconut cream
1 1/2 cups gluten free self-raising flour
1/2 cup desiccated coconut
1 tablespoon lemon rind, finely grated
1/4 cup freshly squeezed lemon juice

Blueberry Sauce
1 cup frozen blueberries
2 tablespoons raw sugar
1 1/2 teaspoons cornflour

Lemon Buttercream
125g olive oil margarine, softened
1 1/2 cups icing sugar mixture
1 teaspoons lemon rind, finely grated
1 tablespoon lemon juice

Method for Poke Cake

1. Preheat oven to 180C then grease and line the base and sides of a 20cm round cake pan with baking paper.

2. Beat the butter and sugar in a bowl until pale and creamy with an electric mixer. Add eggs 1 at a time, beating well after each addition. Add the coconut cream and beat to combine.

3.  Add the gluten free flour and coconut and stir to combine. Next stir in lemon rind and lemon juice.

4. Pour into the prepared pan and smooth the surface. Bake for 45-50 mins or until a skewer inserted into centre comes out clean. I found it took almost 30 minutes more to bake so you will need to keep an eye on it after the recommended bake time. Set aside to cool slightly then place on a serving plate.
 

Method for Blueberry Sauce


Meanwhile, to make the blueberry sauce, combine the blueberries, sugar, cornflour and 1/4 cup (60ml) water in a small saucepan over medium-low heat. Cook, stirring until sauce boils and thickens. Use the back of a spoon to lightly crush the blueberries. Set aside to cool slightly.


Use the end of a wooden spoon to pierce the cake at 3cm intervals. Spoon two-thirds of the warm blueberry filling into each hole, using the end of the wooden spoon to gently push the filling to the bottom of the hole. Set aside to cool completely.


Method for Buttercream


To make the lemon buttercream, use an electric mixer to beat the butter in a bowl until very pale and creamy. Add the icing sugar, lemon rind and lemon juice and beat until smooth and creamy.


Stir the remaining blueberry sauce into the lemon buttercream to create a swirled effect. Spread over the top of the cake and serve.


Finding Nemo Gluten Free Choc Chip Cupcakes

Sunday 18 September 2016

Finding Nemo Gluten Free Choc Chip Cupcakes

Gluten Free Finding Nemo Choc Chip Cupcakes

Gluten Free Vanilla Choc Chip Finding Nemo Cupcakes


It was my nephews 4th birthday so I had to make something special for him. His birthday cake was not gluten free so I decided to make some cupcakes for those of us with a gluten intolerance.

He is mad about the ocean and loves the Octonauts so naturally he loves everything about Finding Nemo.

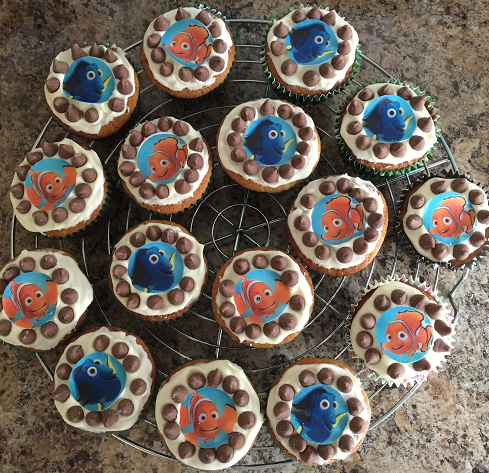
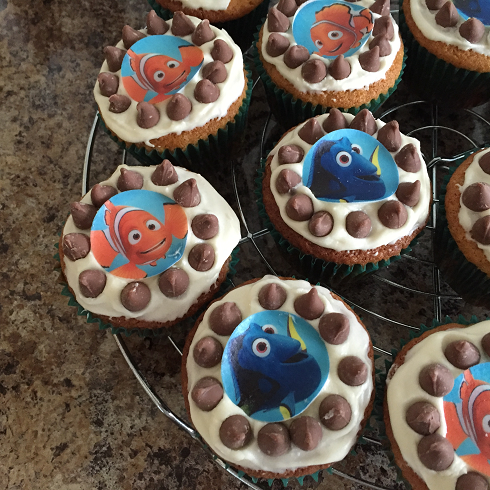
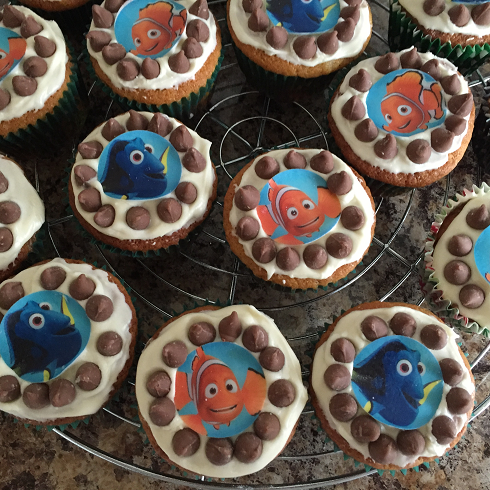
Browsing on eBay I found some Finding Nemo cupcake holders and edible cupcake toppers (made from rice paper and edible ink) perfect! (Unfortunately the toppers were a bit flimsy and as you can see from the photos they curled up but that didn't stop the kids from gobbling them up.)

Then I found a great gluten free vanilla cupcake recipe. I thought it was a bit dull so decided to add choc chips. 

These were more popular with the kids then the cake was. Some of the kids are incredibly fussy eaters. Now that is success!


Gluten Free Choc Chip Cupcakes


Cup Cake Ingredients
1/2 cup (125g) olive oil margarine at room temperature
2/3 cup raw sugar
2 large eggs, at room temperature
1 cup plain gluten free flour
2 teaspoons baking powder
1 teaspoon baking soda
1 teaspoon vanilla extract
1/4 cup lactose free milk
1/2 cup milk choc chips

Vanilla Frosting Ingredients
1 cup pure icing sugar
2 tablespoons olive oil margarine
1/4 cup lactose free milk
1/2 cup milk choc chips

12 Finding Nemo edible cupcake toppers


Cupcake Method
1. Preheat oven to 180C/350F.
2. Line your cupcake tin with cupcake holders.
3. Whip butter and sugar together with an electric beater until light and fluffy.
4. Add eggs, beating well between each addition.
5. Sift in flour, baking powder and soda and stir until combined.
6. Then add vanilla and milk.
7. Finally stir in choc chips until combined. 
8. Divide batter evenly between each cupcake.
9. Bake cupcakes for 12-15 minutes.
10. Remove from oven, cool in pan 5 minutes then transfer to cooling rack to cool completely ready for frosting.


Frosting Method
1. In a medium sized bowl sift icing sugar.
2. Next start with 1 tablespoon margarine and half the milk.
3. Stir until you get a nice thick white icing. Keep adding more margarine and milk until the consistency is right. Keep some extra icing sugar close by in case you need to add some more.
 4. Cover each cupake with a Finding Nemo topper then decorate with choc chips.


Original recipe from  Gluten Free Gigi

Gluten Free Chocolate Cake with Maple Butter Syrup

Saturday 6 August 2016


Gluten Free Chocolate Cake with Maple Butter Syrup

Gluten Free Chocolate Cake Recipe with Maple Butter Syrup

Gluten Free Chocolate Cake

Easy Gluten Free Chocolate Cake Recipe

Gluten Free Chocolate Cake with Maple Butter Syrup


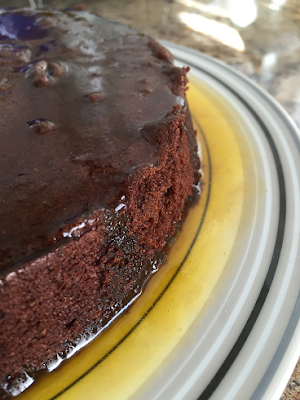
This Gluten Free Chocolate Cake is an adaptation of two Donna Hay recipes. Is is really easy to make and will disappear very quickly.

You can make the cake the day before then make the syrup the day of your event and pour on just before serving to salivating friends and family.

Gluten Free Chocolate Cake

110g lactose free margarine
1 cup brown caster sugar
1 teaspoon vanilla extract
2 eggs
1 cup gluten free plain flour, sifted
1/4 cup premium dutch cocoa, sifted
1 teaspoon baking powder
1/2 cup lactose free milk

Maple Butter Syrup

1/2 cup maple syrup
2 tablespoons lactose free margarine


Method for Gluten Free Chocolate Cake and Maple Butter Syrup

Preheat oven to 160°C/320F.

Put the margarine, sugar and vanilla in the bowl of an electric mixer and beat for at least 10–12 minutes.

Add the eggs one at a time and beat well, scraping down the sides of the bowl.

Next add the flour, cocoa, baking powder and milk and beat until just combined.

Pour the mixture into a greased 20cm/8inch cake tin lined with non-stick baking paper and cook for 40–50 minutes or until cooked when tested with a skewer.

Allow to cool before plating.

Place the maple syrup and margarine in a small saucepan over medium heat and stir until all ingredients are well combined and smooth. Pour the syrup over the warm cake and serve. Serves 8–10.


Notes
Make sure to beat the margarine and sugar together for at least 10 minutes. This way you will get a lighter, fluffier cake. 

Poke holes in the cake before you pour the syrup. This way the cake will absorb the syrup better.


Apple Tart - Gluten and Lactose Free

Sunday 26 June 2016


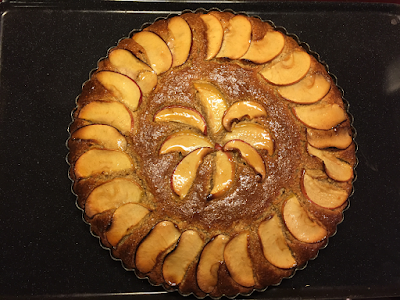
Gluten free, lactose free Apple Tart
Freshly Baked Apple Tart brushed with Maple Syrup


Gluten free, lactose free Apple Tart raw
Apple Tart ready to go into the oven


Gluten free, lactose free Apple Tart baking
Baking away - hurry up looks so good

Gluten free, lactose free Apple Tart easy recipe
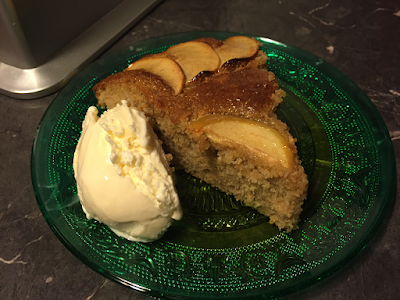
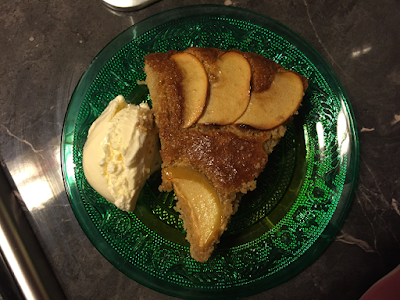
Risen beautiful, soft, light and fluffy and with a scoop of lactose free ice-cream

Gluten free, lactose free Apple Tart with lactose free ice cream
Gluten Free, Lactose Free Apple Tart


I found this delicious gluten free and lactose free Apple Tart recipe in the weekend magazine of the Sunday paper. It's actually a Donna Hay recipe that I altered.

I have yet to find a Donna Hay recipe that I can make exactly as written. She is also the only person who uses pouring cream instead of milk in almost all her recipes which is extremely annoying and frustrating. Ok enough complaining on to my delicious recipe.

I made quite a few changes basically depending on what I had in the pantry. The only thing I had to buy was the gluten free plain flour which was half price so that made me happy.

I also used cashew meal because its cheaper than almond meal and has a mild flavour which I prefer. It also tastes a lot better I think than almond meal as well. In future I am going to use this instead. I made a few more changes but won't bore you with that.

So without further ado I give you the recipe to an incredibly delicious and easy to make gluten free and lactose free Apple Tart.

Apple Tart - Gluten free and lactose free

Ingredients
130gm milk free margarine
1/2 cup brown caster sugar
1 teaspoon vanilla essence
1 tablespoon finely grated lemon rind
1 tablespoon finely grated orange rind
3 eggs
1 1/2 cups cashew meal
1/2 cup gluten free plain flour
1/2 teaspoon gluten free baking powder
1 apple finely sliced
2 tablespoons maple syrup

Method
Preheat oven to 160C/320F. Lightly grease a 26cm fluted loose-based tart tin.

Place the margarine, sugar, vanilla, lemon and orange rind in an electric mixer and beat for 5 minutes or until light and fluffy.

Add eggs one at a time beating well after each addition. Add the cashew meal, flour and baking powder and mix to combine. 

Spoon the mixture into the tart tin and smooth. Press the slices gently into the filling.

Place the tart on a baking tray and cook for 40-45 minutes or until golden. Remove from oven and while hot brush with maple syrup.


Easy Flapper Pie Recipe

Monday 13 June 2016


Freshly Baked Flapper Pie

Hazelnut Meal Crust


Delicious vanilla custard filling
 
Light and fluffy meringue topping


The finished product - Flapper Pie

A slice of fluffy heaven

Easy Gluten Free and Lactose Free Flapper Pie

I found out about Flapper Pie which I had never heard of before from a friend on Facebook - as youe do. He posted a list of pies and this was on it. The minute I saw Flapper Pie I knew I had to make it.

Of course the original has a biscuit base but since I don't eat wheat I found the almond meal variation. You could also use gluten free biscuits to make a gluten free biscuit base if you don't want to use a nut meal. Might try that next time. Also since I am lactose intolerant I used lactose free milk.

I found this pie very easy on my stomach. It is very light and easy to digest so a few slices will go down a treat!

I did find it a bit bland though. It didn't help that I forgot to sprinkle some almond meal on top to add some crunch which it does need for that extra texture.

Don't let the three layers scare you, it is so easy to make. Just take it a step at a time, put it together as instructed and you will have a lovely Flapper Pie in no time.

Original recipe from The Kitchen Magpie


Easy Gluten Free, Lactose Free Flapper Pie


Crust
1 ½ cups nut meal (I used hazelnut meal but you can use almond)
¼ cup melted coconut oil
dash of cinnamon

Filling
2½ cups lactose free milk
½ cup of white sugar
¼ cup of gluten free corn starch
3 egg yolks
1 tsp vanilla
pinch of salt

Meringue Topping
3 egg whites
¼ cup of sugar
¼ tsp of cream of tartar

Topping
2 tsps almond meal

1. Mix all the crust ingredients together and press all around and up the sides of a 25cm/10 inch pie dish. Bake at 180C/350F for 10 minutes.

2. Combine all the ingredients for the filling and mix together. Cook on a medium heat until it boils and thickens, making sure to stir constantly (this is the secret)! Set aside to cool while you make the meringue. (Note this will get a skin on it unless you place a layer of baking paper on top).

3. Beat the meringue ingredients together until they form stiff peaks.

4. Pour the filling into the crust and top with the meringue. Make little peaks with a fork which will brown when baked. Sprinkle the almond meal on the top then bake in a 180C/350F degree oven until the meringue browns, around 10 minutes. Keep an eye on it though so it doesn't burn.

5. Cool in the fridge and eat the same day.

Note: This pie does not last long as the meringue on top gets gooey and the nut meal crust gets moist and gets soggy so eat the same day or next day. It won't last longer than that.

Gluten Free Black Forest Roulade

Monday 18 January 2016


Gluten Free Black Forest Roulade
Slice of Gluten Free Black Forest Roulade


I found this delicious gluten free Black Forest Roulade recipe from one of the Woolies Fresh Magazines. I would love to say it is lactose free but it isn't.

I have yet to master getting thick cream from cans of coconut cream. I have tried several times to put coconut cream in the fridge but the cream is not hard enough so is of no use. Plus you would need about 8 cans to get enough cream to make this recipe.

I was going to use the lactose free cream but it says not suitable for whipping so there goes that idea. It would be nice if someone could make a lactose free cream that you can whip then I would definitely use it.

Since you are only have a slice or two of this, there won't be a lot of cream in there so we will just have to suffer a little for a glorious piece of roulade.


Black Forest Roulade

Ingredients

5 eggs, separated
2/3 cup raw caster sugar
225g dark choc melts, melted, cooled
2 tbs sifted icing sugar,
2 tbs sifted cocoa powder
200g cherries, pitted, halved
300ml cream

Method

1. Preheat oven to 180°c. Line a 25 x 35cm baking tray with baking paper.

2. Beat egg yolk and sugar with electric beaters until thick and pale. ( Do not overbeat because then your roulade will become too soggy and will crack when you roll it out like mine did!)

3. Gently fold in melted chocolate.

4. In a clean bowl and with clean beaters, beat egg white until stiff peaks form. Gently fold into chocolate mixture in two batches. Spoon into pan and spread evenly.

Bake for 12-15 minutes or until set. Take out of oven and place a layer of baking paper over the top so roulade doesn't dry out while you wait for it to cool. Give it about 15 minutes. Cut another piece of baking paper a little larger than the baking tray and place on bench.

5. Once cool sprinkle the top of the roulade with icing sugar. Place the baking paper back on top. Then get a new tray around the same size as the baking tray with the roulade and flip roulade onto new tray then slide onto baking paper on bench. 

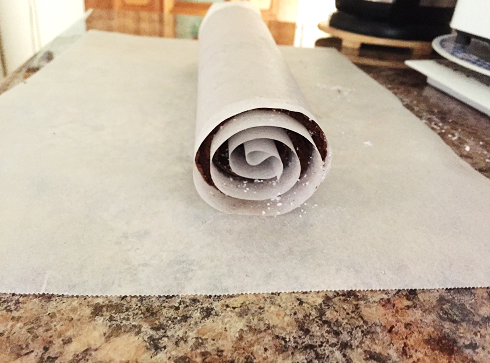
 6. Gently peel off the bottom layer of the roulade then roll it gently but tightly from the shortest end which is the one measuring 25cm.
 
Rolled Up Gluten Free Black Forest Roulade

 Leave to cool to room temperature.
 
Cooling Gluten Free Black Forest Roulade

 7. Next whip cream and icing sugar together until thick. When cake is cool, gently unroll. If you see any crack don't worry about it as you will cover it up with the icing sugar.

Gluten Free Black Forest Roulade with Cream

Spread with cream covering the curliest end from the edge which will be your centre but leaving a 1cm gap around all other edges so cream doesn't spill out when you roll it up.


8.Then top with cherries.
Gluten Free Black Forest Roulade with Cherries

Re-roll, dust with all over with cocoa powder and transfer to a serving plate.

Gluten Free Black Forest Roulade Whole


Nutritional information
Per Serve:
6.5g protein
27g fat (18g saturated fat)
45gm carb
0.5gm dietary fibre
1850 kj (440cals)


Related Posts Plugin for WordPress, Blogger...

Sia's Cooking Blog Designed by Ipietoon Blogger Template