Showing posts with label lactose free. Show all posts

Gluten Free Cloud Cake

Wednesday, 28 May 2025


Cloud Cake Gluten Free


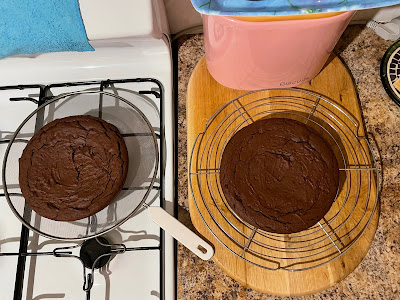
Gluten Free Cloud Cake Fresh Out of the Oven


Gluten Free Cloud Cake Dusted with Icing Sugar

This Gluten Free Cloud Cake Recipe recipe came up on my Facebook feed and as soon as I saw it I knew I had to bake it so I did. I don't have any details as of where it has come from so if you recognise it please let me know to attribute it. 


It is so easy to make and a delight to eat. I suggest slicing it up as soon as it comes out of the oven hahah. It is heaven to eat warm it just melts in your mouth. Memorable. This is one of those cakes that stays in your memory bank.


GLUTEN FREE CLOUD CAKE 


Ingredients:

4 eggs

450 g lactose free yogurt

1 pinch of salt

120 g sugar

100 g gluten free cornstarch

1 tsp gluten free baking powder


Method:

1. Preheat your oven to 170 °C (350 °F).


2. Line the bottom and inner edge of the spring form pan with baking paper.


3. Separate the eggs then beat the egg yolks with the sugar with an electric mixer until the sugar has dissolved.


4. Next add the cornstarch and baking powder and mix well by hand. Then add the yogurt to the bowl and combine all well.


5. Beat the egg whites with a pinch of salt until stiff peaks form, then fold the beaten egg whites into the batter. It will look like fluffy clouds in a bowl.


6. Now pour the mixture into the pan and bake for about 50 minutes until the cake is golden brown.


7. You can let the cake cool then remove from the pan, and sprinkle with powdered sugar or remove from pan once it is straight out of the oven slice and eat. It is heaven warm, it just melts in your mouth. Memorable. 


Gluten Free Zucchini Slice

Thursday, 13 June 2024


This is a delicious light and fluffy gluten free and dairy free Zucchini Slice. Super easy to make, bake and eat. You can also freeze and it reheats beautifully as if freshly made. 

My slice pan was smaller than recommended so if you don't have the size listed below a smaller one will be fine. 


Gluten Free Zucchini Slice

Ingredients

2 zucchini, coarsely grated
1 brown onion, finely chopped
3 bacon rashers, finely chopped
1 cup (120g) shredded dairy free tasty cheddar
1 cup (150g) gluten free self-raising flour
1/2 cup (125ml) light olive oil
5 Coles Australian Free Range Eggs, lightly whisked

Method

1. Preheat oven to 180°C. Grease a 20cm x 30cm slice pan and line with baking paper. Place the zucchini in a colander over a large bowl and use your hands to squeeze as much liquid from zucchini as possible. Discard the liquid.
   
2. Place zucchini in the bowl. Add the onion, bacon, cheese, flour, oil and egg and stir to combine. Season. Pour into the prepared pan. Bake for 35-40 mins or until golden brown and cooked through. Cut into pieces to serve.
 

Original recipe is here


Nutritional information
Per serve: Energy 2146kJ/513 Cals (25%), Protein 19g (38%), Fat 39g (56%), Sat Fat 12g (50%), Carb 21g (7%), Sugar 3g (3%), Dietary Fibre 2g (7%), Sodium 819mg (41%).


Avengers Gluten Free Zebra Cake

Wednesday, 7 September 2022

Avengers Gluten Free Zebra Cake

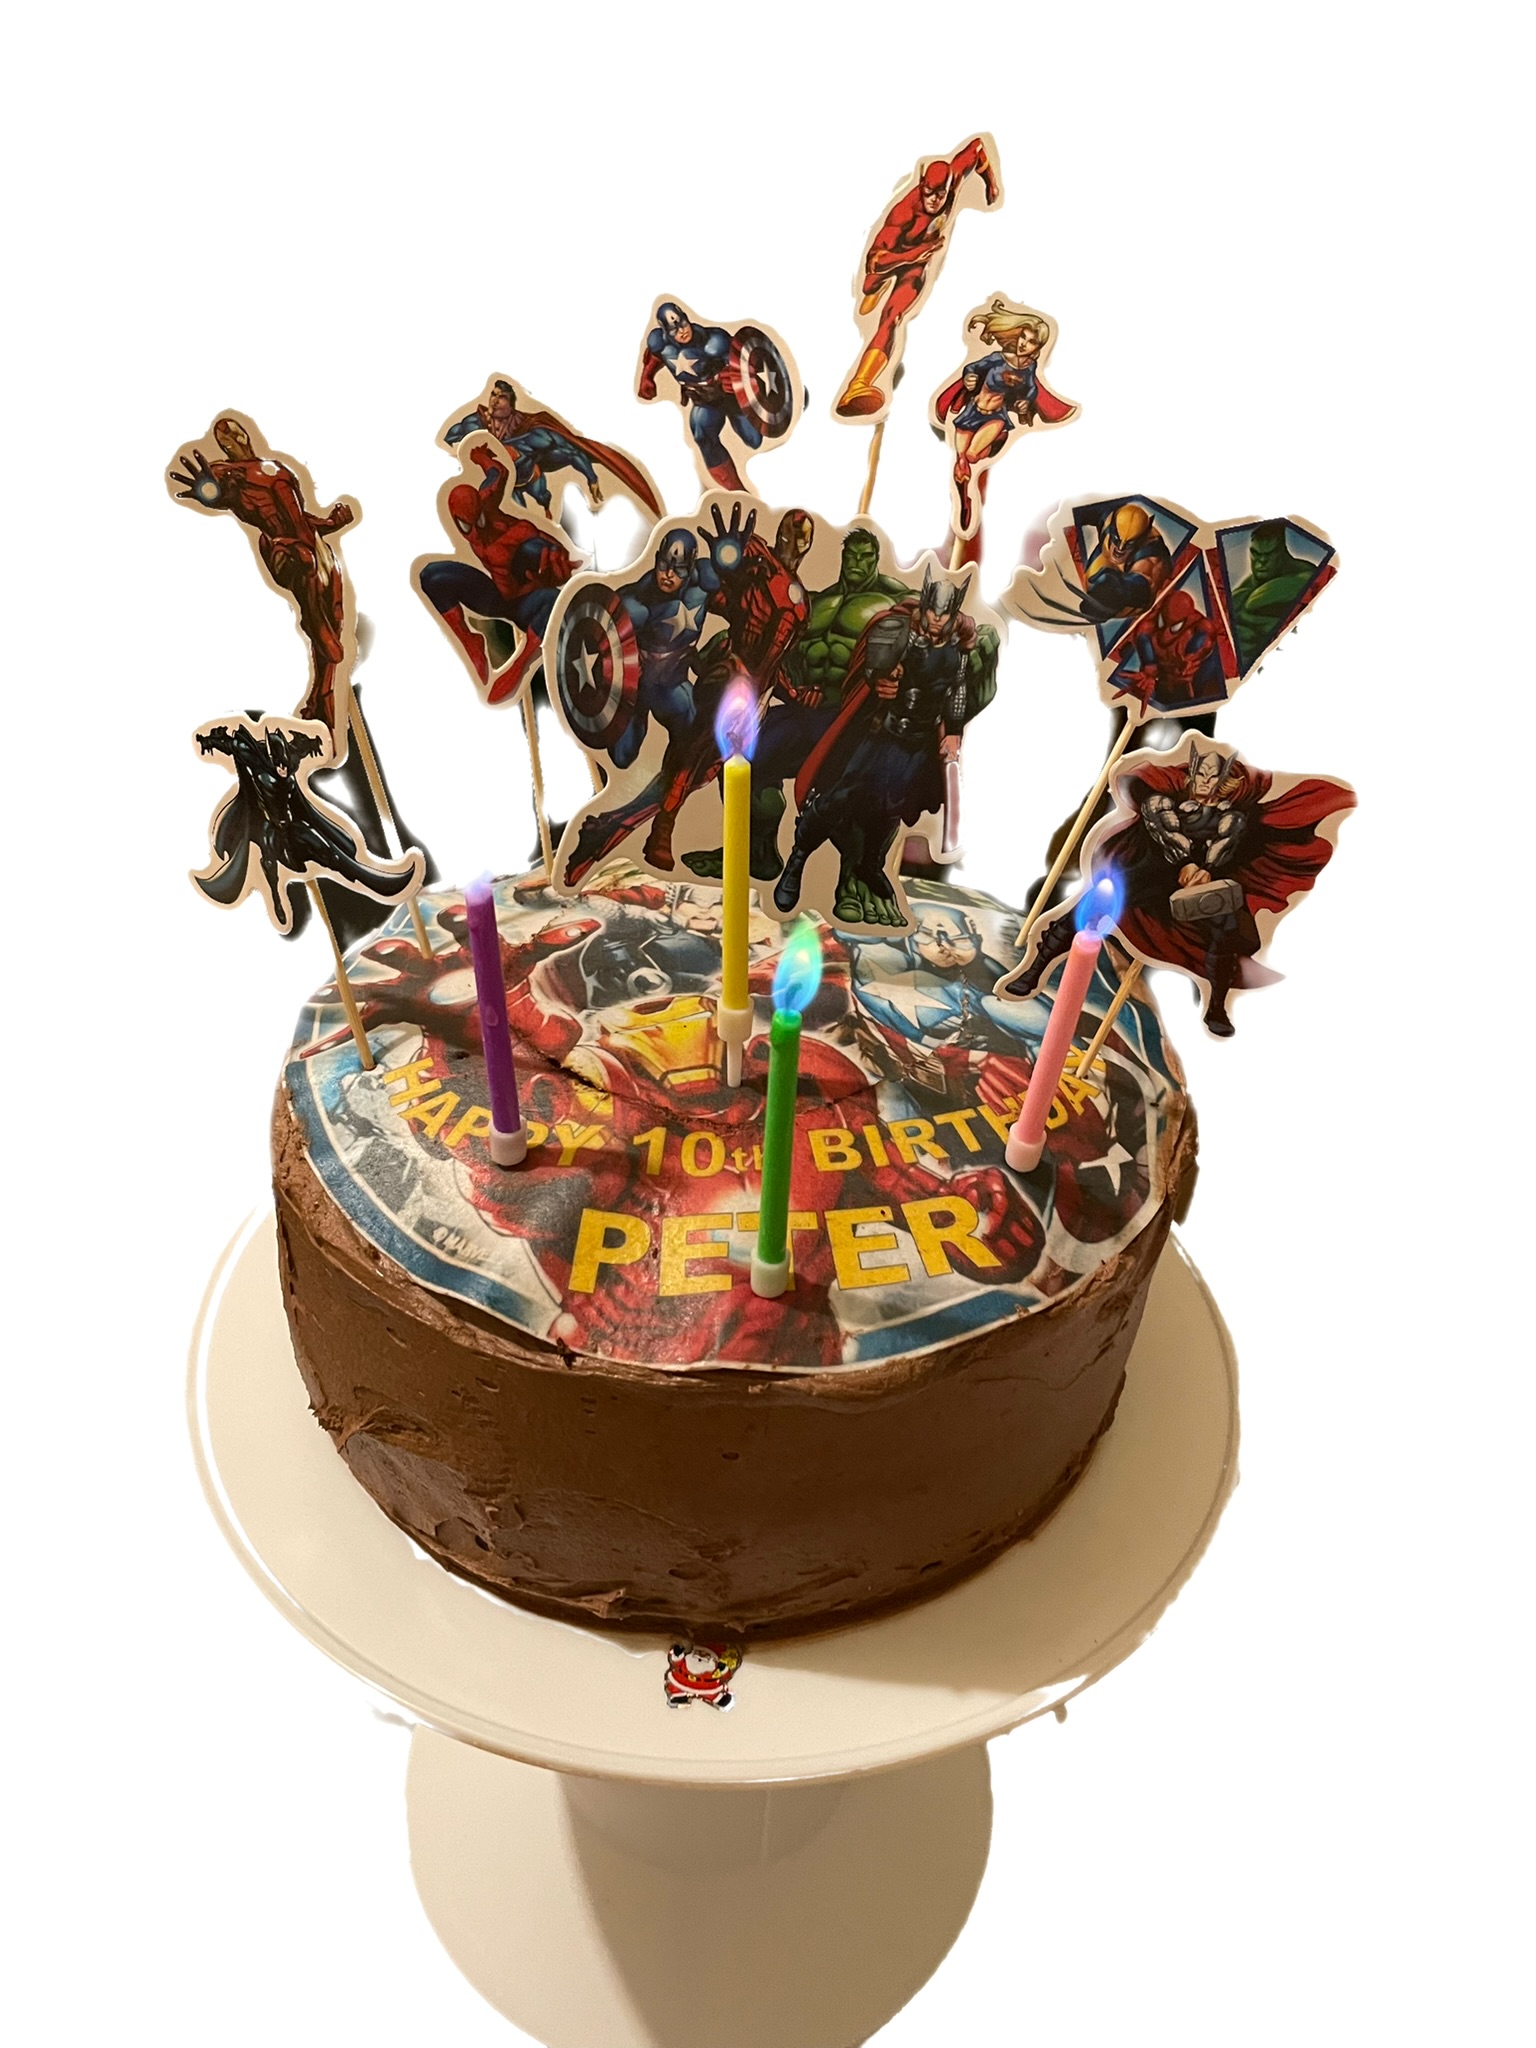
I made this gluten free Avengers zebra birthday cake for my nephews 10th birthday. I wanted to make something different so decided to mix chocolate and vanilla together. 

This cake did not turn out well at all inside hahaha. Somehow little rocks formed! My sister said did you put rice bubbles in here. I didn't. I don't know what happened it didn't work out but it did look good. I would love to try again especially for the icing which saved the cake because the next day it was soooo dry inside haahah.

I completely forget to photograph inside but its for the best because it looked a mess. It looked more like a chocolate cake with specks of vanilla inside. 

The Avengers flying on top of the cake and the personalised cake topper I got from eBay.

Let me know if you try it and it works!

Avengers Gluten Free Zebra Cake

Base vanilla cake batter:

1 1/4 cups (300 grams) lactose free milk or any dairy free milk, room temperature
2 tsp apple cider vinegar (to be mixed with dairy free milk)
3 2/3 cups (460 grams) gluten free plain flour
2 tsps baking powder
1 tsp baking soda
1 cup (220 grams) white sugar
3/4 cup (170 grams) flora margarine or any dairy free margarine, room temperature
3/4 cup (190 grams) mashed bananas (3 small or 2 large) or pureed applesauce, room temperature
1 tbsp vanilla extract

For the chocolate cake batter:

1/3 cup (33 grams) cocoa powder
1/4 cup (60 grams) Zymil lactose free milk or dairy free milk
2 tbsp dairy free margarine or butter, melted and cooled

Buttercream

2 cups (460 g) dairy free margarine or vegan butter, room temperature
1 cup (100 grams) sifted cocoa powder
3 cups (600 grams) sifted powdered sugar
1/4–1/3 cup dairy free milk (such as soy milk or oat milk)
 

Instructions

Preheat the oven to 180C/350 F. Grease two 20cm/8″ cake pans with cooking oil, and line them with baking paper/parchment paper. Set aside.

Prepare the buttermilk. Combine the milk with the apple cider vinegar, and set aside to sit for 5-6 minutes. 

In the meantime in a medium bowl, stir together the flour, baking powder, and baking soda. Set aside.

Make the vanilla batter: In a stand mixer with paddle attachment or a large bowl with hand mixer, cream together the margarine and sugar until fluffy, about 2-3 minutes. Scrape down the sides as needed. Then add in the pureed banana or applesauce and vanilla extract. 

Mix again on medium speed until combined, scraping down the sides as needed. Add in about half of the dry mixture, along with half of the buttermilk, and mix on medium speed until just combined. 

Add in the remaining dry mixture and buttermilk and mix on medium speed until there are no more dry streaks. Make sure to scrape the bottom of the bowl as well as the sides.

Make the chocolate batter: divide half of the vanilla cake batter into a separate bowl. Add in the cocoa powder, remaining dairy free milk and melted butter into one of the bowls. Stir the ingredients gently into the batter until it becomes a chocolate cake batter.

I DON'T UNDERSTAND THIS PART AT ALL BUT HERE ARE THE INSTRUCTIONS:
How to make a zebra pattern in the batter: now we’ll divide the batter into the cake pans in a zebra pattern.  Take a large spoon and spoon about 1/4 cup of vanilla batter into the middle of both cake pans. Then take another large spoon and spoon about 1/4 cup of chocolate batter directly on top of the vanilla cake batter. 

Repeat, alternating between vanilla and chocolate cake batter until the batters are finished. Gently tilt the cake pans to get the batter to touch the edges of the pan if they aren’t already. Do not tap the cake pans onto countertop. This will release any air bubbles that will help the cake rise.

Bake the cakes immediately after creating the zebra pattern. Bake for 35 - 45 minutes or until the toothpick comes out clean.

Remove from the oven and allow the cakes to cool in their pans for 10 minutes, then transfer them to a cooling rack to cool completely. Once cooled completely (there is absolutely no warmth to the touch!), then you can prepare your buttercream.

Buttercream
In a large bowl with a hand mixer, cream the butter until fluffy and light, about 2-3 minutes.

Add in the cocoa powder and 1 cup of the powdered sugar. Continue creaming the mixture, adding in the remaining icing sugar in 1 cup intervals until smooth. Add in 1-2 tbsp dairy free milk at a time to help achieve a creamy texture.

Ice the cake as desired, slice and enjoy!


The original recipe is from Banana Diaries and here is the buttercream recipe.


Figs in Syrup

Saturday, 4 June 2022


We cut down our fig tree because it attracted all the wildlife but there were many small figs on the branches so I picked them and with my sisters suggestion I made figs in syrup.

The recipe I found said to use almonds and pour lemon juice on the figs which I did but I don't think this is necessary so I will take these steps out of the recipe. If you want to follow full recipe just click on link at bottom of page. 
 

Figs in Syrup

Ingredients
25 figs
1 kilo sugar
25 cloves
3 cups of water

Method
Rinse figs thoroughly.

Put them in a big pan with a lot of water and boil them for about 10 minutes.


 Strain them and rinse them with cold water. Put them back into the pan and boil them again for another 10 minutes. Strain them and put them in the same pan with cold water and leave them over night.

 The next day, change the water and boil them again. They should be soft and tender in 10 minutes. 

Strain them and place them on a towel and let them stand for 24 hours so that they will not have any more water inside them. 


Then insert a clove in each fig. (Original recipe called for almonds but they do absolutely nothing so skip this part).


Put 3 cups of water in a clean pan and stir in sugar to dissolve. Bring the syrup to the boil for 10 minutes. Skim the foam if necessary. 


Add the figs and continue boiling for another 10 minutes. Let them stand until the next day.


 The next day start the boiling again until you have a thick and sweet syrup.


Sterilize jars by boiling them for 10 minutes then let stand to cool. Sterilizing will add 3-4 years storage of the figs.


 Place figs in syrup in jars and store or enjoy straight away.


Original recipe for the figs in syrup is here


Gluten Free Zucchini Lemon Cake


Gluten Free Zucchini Lemon Cake

Gluten Free Zucchini Lemon Cake Slice

Easy Gluten Free Zucchini Lemon Cake

I found this very yummy recipe for Zucchini, Lemon & Poppyseed cake in the Woolies magazine. I don't like poppy seeds so I took those out and I changed it to be gluten free. 


I used a trombocchino zucchini I have growing in the backyard and got a deliciously divine cake.


This is a super easy, light and fluffy gluten free cake to make. You can't taste the zucchini at all this is a lovely lemon flavoured caked that is so delicious. I hope you try it.


Gluten Free Zucchini Lemon Cake

Ingredients
1 small lemon
2 free range eggs
1/2 cup Woolworths rice bran oil
1 tsp vanilla extract
1 cup caster sugar
2 cups Woolworths gluten free self-raising flour
250g zucchini (2 zucchinis), finely grated

Icing
1 1/2 cups pure icing sugar, sifted
1 tsp dairy free butter or margarine, softened
2 tbs dairy free milk  (I used Macadamia Milk)


Method
1. Preheat oven to 180°C/160°C fan-forced. Grease a 20cm  (7cm deep) round cake pan. Grease and line base and sides with baking paper.


2. Zest and juice the lemon. Whisk together the eggs, oil, vanilla, caster sugar, zest and lemon juice in a large bowl until smooth and combined. Stir in gluten free flour and zucchini until just combined. This will make sure the cake will come out light and fluffy. 


3. Pour mixture into cake pan and bake for 45 minutes or until a skewer inserted in centre comes out clean. I found I had to bake it for 60 minutes. Cool cake then transfer to a wire rack to cool completely.


4. Combine icing sugar, butter and milk in a medium bowl to form a thick spreadable icing. Spread icing over cake and serve.


You can find original recipe here


Easy Lactose Free Rice Pudding Recipe

Tuesday, 17 May 2022


Lactose Free Rice Pudding

Easy Old Fashioned Rice Pudding Recipe

Thick and Creamy Rice Pudding Recipe

We had a carton of Liddell's lactose free milk in the fridge and my sister said make rice pudding and here we are.

I was surprised to find that people are putting eggs in their rice pudding! Oh no, no, no, no, no! Yuck. 

This is a simple, easy rice pudding recipe as it should be of rice, milk, sugar and some vanilla extract and the last can be omitted because you don't even need it. Plus a pinch of salt to help the rice cook.

I have to say it's nicer to say rice pudding in Greek which is rizogalo. It's a lovely word. The English word is so plain and boring. So sad hahahaah

Anyway this is a simple lactose free rice pudding recipe easy to make and is ridiculously thick, creamy and delicious. You will definitely enjoy.


Lactose Free Rice Pudding

Ingredients
2 1/2 cups (600ml) lactose free milk
1/2 cup water
1/3 cup (66g) uncooked short grain white rice
Pinch salt
1/4 cup (50g) sugar
1 teaspoon vanilla extract


 Method

1. Wash the rice under cold running water until water comes out clear.

2. In a medium sauce pan stir together the lactose free milk, water and rice.

3. Add the rest of the ingredients of salt, sugar and vanilla extract and mix continuously as mixture comes to a boil over high heat. 

4. Once it starts boiling reduce the heat to low and simmer until the rice is tender which is around 20-25 minutes. Stir frequently to prevent the rice from sticking to the bottom of the pan. 

5. The pudding will thicken as it cools; when it is warm, it will be a bit on the runny side.

Serve warm or cold. I love rice pudding warm so eat up once you plate.


Original recipe is from Simply Recipes

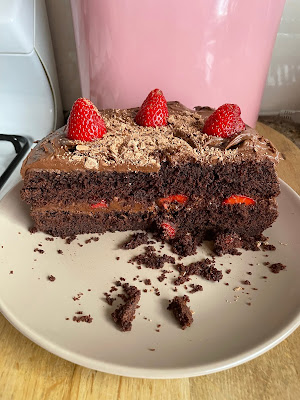
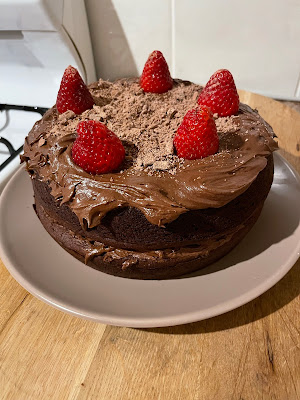
Decadent Jamie Oliver Gluten Free Chocolate Cake

Sunday, 12 December 2021


I was looking for a decadent gluten free birthday cake for my sister's birthday. She always has two. One for immediate family and the other for both parents, ours and her in laws. 

So this year being such a yucky year I decided to make a selfishly decadent gluten free cake which can also be a vegan cake all thanks to Jamie Oliver. 

The only reason it is a gluten free chocolate cake and not a vegan chocolate cake is because I accidentally got lactose free yoghurt, I swear I thought it was soy and I used normally margarine because I thought it would come out better.  

I will leave experimenting up to you. Either way this cake is ridiculously decadent and delicious. 

Enjoy.  


Decadent Jamie Oliver Gluten Free Chocolate Cake

Ingredients
300 g margarine (substitute dairy-free margarine suitable for baking) , plus extra for greasing
300 g gluten-free plain flour
300 g caster sugar
2 teaspoons vanilla extract
200 g lactose free yogurt  (substitute soy yogurt)
2 teaspoons gluten-free baking powder
70 g cocoa powder
6 tablespoons rice milk
100 g fresh strawberries
dairy-free dark chocolate (70% cocoa solids), to serve

Icing
200 g icing sugar
4 tablespoons cocoa powder
100g margarine (substitute dairy-free margarine)
2 tablespoons lactose free yoghurt (substitute organic soy yoghurt)


Method

Preheat oven to 190ºC/375ºF/gas 5. Grease two 20cm/8"inch cake tins with margarine, then line the bottom with baking paper and dust the sides with gluten-free flour.

In a bowl, beat the margarine and sugar for around 5 minutes, or until light and fluffy. Add the vanilla extract and yoghurt, then mix until combined.

Sift the flour, baking powder and cocoa powder into the bowl, then fold through. Add the rice milk and stir briefly until you have a nice, smooth batter.

Carefully divide batter between the cake tins, then place on the middle shelf of the hot oven for 45 minutes (SEE BELOW), or until an inserted skewer comes out clean. 

(The original recipe calls for 20-25 minutes but the cakes were raw! I actually cooked the cakes for 50 minutes but they came out a little dry so go for 40-45 minutes. The cakes need to be a little fudgy so a little raw. They will cook a little more as they cool down. A fudgy cake is nice to eat! Skewer doesn't need to come out clean. Experiment! )

Leave to cool for 5 minutes, before turning the cakes out onto a wire cooling rack, then leave to cool completely while you make the icing.

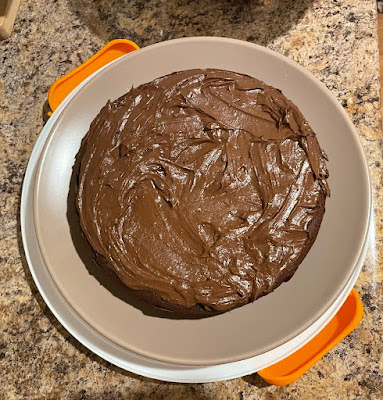
Sift the icing sugar and cocoa powder into a large bowl, then add the margarine and beat until smooth. Stir in the yoghurt to combine.

Once cooled, place one of the sponges on a plate or cake stand. Carefully spread half the butter icing on top.

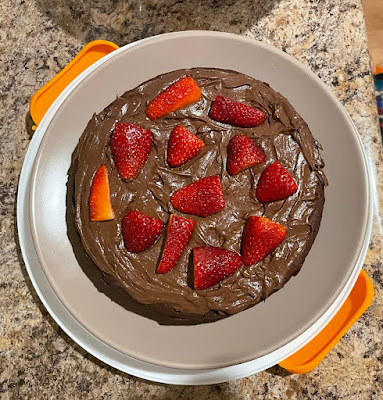
 then scatter over most of the strawberries. 

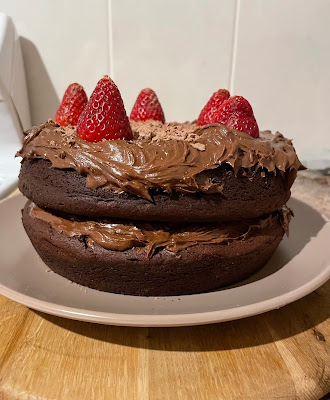
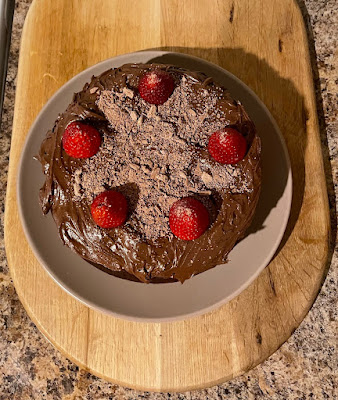
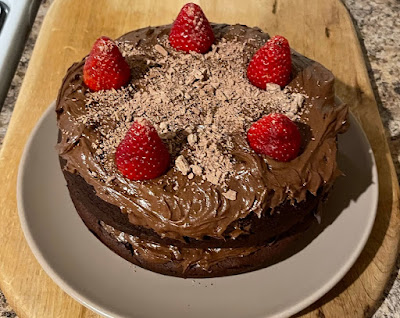
Sandwich the second sponge on top and press down lightly, then carefully spread the remaining icing over the top and finish with a scattering of strawberries and a few shavings of chocolate. I used a small flake. 


Find the original Jamie Oliver Vegan Chocolate Cake Recipe Here


Gluten Free Steamed Treacle Sponge Pudding

Monday, 16 August 2021


Gluten Free Golden Syrup Steamed Pudding
 
Easy Gluten Free Steamed Treacle Pudding   


Gluten Free Steamed Treacle Pudding
 
Gluten Free Steamed Treacle Sponge Pudding 
 

I made this wonderful gluten free steamed treacle pudding because I am currently reading a book that is set in the 1940's. In this book a treacle pudding was mentioned so lovingly that I had to look for the recipe and make it.  


Of course the recipe had to be from an English source as a steamed treacle pudding is very British and I searched and found this one.


I changed it to be a gluten free recipe and it works wonderfully.


Make sure the margarine and eggs are room temperature as they will curdle. It happened to me! The way to fix it is add some flour a little at a time until it smooths out a bit then add the milk and it's back to normal. 


I also found that most of the syrup didn't get absorbed by the pudding so it looks like a giant creme caramel hahah. I don't know why this happened but the gluten free steamed pudding was still incredibly moist and delicious.  


My pudding basin was also a 2 litre so I didn't need to put any baking paper, foil and string which seems such a chore. 


I have kept these details in the recipe in case you pudding steamer is the right size. Since most have lids is this even necessary any more. I don't know. I'm just trying to be helpful. 


If you are looking for some lovely light on the tummy comfort food you have found it. Enjoy. 


Gluten Free Steamed Treacle Pudding

Ingredients
150 gm margarine room temperature, plus extra to grease
125 ml golden syrup
25 gm caster sugar
2 large eggs room temperature
150 gm gluten free self-raising flour
½ tsp fine sea salt
100ml Zymil lactose free milk


Method
Generously butter a 1.2-litre pudding steamer. Lay out a large sheet of foil and top with a sheet of baking paper. Butter the paper, then fold both layers to make a pleat in the centre. (Lots of YouTube videos to show you how to do this). This will cover the pudding steamer.


Pour 125ml golden syrup into the base of the pudding bowl.


Cream 150g margarine and the sugar together in a mixing bowl until they are light and fluffy. Beat in the eggs, then sift in the flour and salt and mix again. Add the milk and mix until nice and smooth.


Then dollop this mixture on top of the syrup in the pudding steamer. 


Cover with the baking paper and foil, buttered paper-side down. Tie securely with string, making a handle to easily lift the basin. Trim the excess paper and foil to prevent water getting into the pudding as it steams. (Once again lots of YouTube videos to show you how to do this).


At the bottom of a large deep pot place a small upturned saucer or a trivet then place the pudding steamer on top. Fill pot so steamer is covered halfway with boiling water. Top up every 30 minutes and steam for 1½ hours. 


A skewer placed into the centre (through the coverings) should come out without any sticky sponge crumbs.


Remove the foil and baking paper coverings and place a large plate on top of the steamer. Turn out and serve with custard or cream or just enjoy with the lovely extra syrup flowing down the sides.


Original recipe is from Sainsbury Magazine UK

Easy Gluten Free Banana Bread

Friday, 30 July 2021

gluten free banana bread recipe australia
 
Easy Gluten Free Banana Bread

Gluten Free Banana Bread


I made this gluten free banana bread because I had two ripe bananas and I didn't want to throw them away so I made this delectable dessert. 


This is a lovely, light and moist gluten free banana bread. So easy to make and even easier to eat. It will be gone before you know it. 


For the sugar I used a mix of white sugar and raw sugar. Since I used the fork to mash the bananas I kept it to stir all the ingredients for the cake. 


I didn't have all the self raising flour I needed so I used a cup of plain gluten free flour and added a teaspoon of baking powder. It did the trick.


Just use what you have it almost always works out in the end hahaha. 


Try and have all ingredients at room temperature. I think this is why my bread has a little sunken tummy in the middle. Oh well still tastes great. It's always in the taste. 


Enjoy.


Super Easy Gluten Free Banana Bread


Ingredients

2 very ripe bananas mashed
⅓ cup melted coconut oil or dairy-free margarine
1 teaspoon bi-carb soda (baking soda)
1 ½ cups self raising gluten-free flour
Pinch salt
¾ cup granulated sugar
2 large eggs room temperate 80gms each, beaten
1 teaspoon pure vanilla extract
1/4 teaspoon cinnamon


Method

Preheat the oven to 180C (350° F).
Grease a 13cm x 23cm loaf pan with dairy free margarine.
In a mixing bowl, mash the ripe bananas until smooth. Since I used a fork to mash the bananas I kept it to mix the whole cake. 
Next add bi-card of soda to banana mix and stir until dissolved.
Stir in the melted butter coconut oil then add sugar, salt, eggs, vanilla extract and cinnamon.
Pour the batter into a greased loaf pan and bake on center rack for 50 minutes to 1 hour or until a toothpick inserted in the center comes out clean.
Best enjoyed warm so as soon as you can, place the gluten free banana bread on a rectangular dish and start slicing. Enjoy!
Store in an air-tight container. 


Original recipe from Mama Knows Gluten Free.

Comfort Food Gluten Free Cornbread

Thursday, 8 August 2019

Gluten Free Cornbread

Comfort food gluten free cornbread
 
fluffy gluten free cornbread

gluten free cornbread recipe

This gluten free corn bread recipe is absolutely divine. The perfect comfort food for a wintery Melbourne day. The secret is not to over mix it.

I made the corn bread because I had a lot of left over polenta from a previous recipe and then for some reason I thought of cornbread which I have never made before. What a mistake! The next problem is deciphering between polenta and cornmeal.  

There is no difference between polenta and cornmeal. It is the same thing!  

Once I figured this out I went on a search for the prefect cornbread recipe and I found it. Think no more and get making this is such a pleasure to make and eat because it is so easy. I also loved using my skillet which I hadn't used in years. Another long lost pleasure found. I felt so old fashioned and I loved it hahaha.

It may look a little dry but it is absolute perfection when you eat it especially piping hot from the oven.

Spread some margarine over the top and drizzle with some maple syrup and you will be in heaven.


Gluten Free Cornbread

Ingredients:
1 1/2 cups gluten free plain flour
1 1/2 cups fine polenta (corn meal - same thing)
1/3 cup sugar
2 tsp baking powder
1 tsp baking soda
1 tsp salt
2 x 60gm eggs
1 1/2 cups lactose free milk (buttermilk, whole milk, or almond milk work great)
6 tbsp dairy free margarine


Method:
Preheat oven to 200°C and grease a medium-sized cast-iron skillet (or 20 × 20 cm baking dish) with  margarine then place inside oven.

In a large mixing bowl add the flour, cornmeal, sugar, baking powder, baking soda, and salt and whisk until well combined.

Melt the margarine then let it cool slightly while you whisk together the eggs and milk in a separate bowl. Once the margarine has cooled down a little add it to the wet ingredients.

Pour the wet ingredients into the dry and stir gently with a wooden spoon making sure not to over-mix. Just make sure all are just combined. This is the secret to making it light and fluffy.

Remove the heated skillet (or baking dish) from the oven and pour the batter in. Turn the oven down to 180°C and bake for 20-25 minutes, or until the top is brown and an inserted toothpick comes out clean.

Let the cornbread cool slightly then serve with dairy free margarine and any sweet condiment like maple syrup or honey for that maximum comfort food feeling!

 Original recipe is here

Gluten Free, Lactose Free Christmas Trifle

Saturday, 30 December 2017


This refreshing gluten free, lactose free trifle will be a huge hit at any Christmas dinner. Even though there are a few layers to it, it is relatively easy to make. 

You just need to have some patience as this was made over a few days mainly to make sure everything set and was cooled enough to assemble.

Instructions for Christmas Trifle

Ingredients

2 x 85 gm packets strawberry jelly
350 gm strawberries
1 gluten free swiss roll
750ml lactose free custard
200gm strawberries for topping

Method

Step 1.   Make jelly per packet instructions. Pour into trifle bowl then add strawberries. Allow to cool then place in fridge overnight.


 Step 2.   Make gluten free swiss roll per instructions below or follow link.  Once roll has cooled completely, cut most slices in half and arrange around bowl as shown.


Step 3.  Make custard per instructions below. Make sure custard has cooled completely before adding to trifle. Pour custard over the top and smooth out.
 

Step 4. Just before serving add some strawberries on top.


Jelly

Follow packet instructions then add 300gm strawberries.

Gluten Free Swiss Roll

The recipe for the Gluten Free Swiss Roll is here.

Lactose Free Custard

750ml lactose free milk
3 whole free range eggs
4 teaspoons vanilla bean extract
2 tablespoons cornflour
1/4 cup caster sugar

Heat milk in a saucepan and bring to almost boiling point, then remove from the heat.
Beat the eggs, sugar and cornflour in a stainless steel mixing bowl until combined.
Pour the hot milk over the eggs and whisk in well.
Pour the egg mixture back into the saucepan and cook over a gentle heat, stirring with a wooden spoon until it thickens and coats the back of the spoon.
Remove from the heat quickly and pour back into the mixing bowl.
Strain through a sieve to get any lumps out. Whisk a little to help cool down then place a layer of cling film over the top making sure to touch the surface of the custard. This is so a skin doesn't form. Allow to cool then place in fridge to go cold.

Custard recipe from The Healthy Chef  with some variation from me.


Related Posts Plugin for WordPress, Blogger...

Sia's Cooking Blog Designed by Ipietoon Blogger Template