Showing posts with label Chocolate Cake. Show all posts

Gluten Free Chocolate Mud Cake with Caramel Ganache

Wednesday, 8 May 2024


I wanted to make this gluten free Chocolate Mud Cake with Caramel Ganache for ages. Then last week I made it because I am about to start on Ozempic and I wanted a good last treat before I began as I am only allowed 100 gm of carbs per day!

I changed the butter to margarine to reduce the lactose in the cake. It is ridiculously delicious. Its one of the best cakes I have ever made and eaten. The ganache is ridiculously delicious too. 
 
I also added small chocolate eggs on top as I made it for Easter Sunday. The original recipe calls for caramel popcorn but you can add any toppings you like.  

Once it goes in the fridge it gets very hard so I recommend heating it up in the microwave for 25 seconds per slice. Then it warms and softens as it came fresh out of the oven.

This cake gets very solid once you put it in the fridge so zapping it in the microwave for about 25 seconds per piece makes it soft and delicious as if it came fresh out of the oven. 
 
You're welcome!

Gluten Free Chocolate Mud Cake with Caramel Ganache

Ingredients
1 1/2 cups (330g) brown sugar
250g margarine room temperature
200g dark chocolate, chopped
2 free-range eggs room temperature, lightly whisked
1 1/4 cups (185g) gluten free plain flour
1/4 cup (35g) gluten free self-raising flour
1/4 cup (35g) gluten free cornflour
1/4 cup (25g) cocoa powder

Caramel Ganache
2 x 180g pkts or 1 x 350gm pkt Cadbury Caramilk chocolate, chopped
1/3 cup (80ml) Zymil lactose free thickened cream


Method

1. Preheat oven to 150°C. Grease the base and side of a 17cm (base measurement) round cake pan and line with 2 layers of baking paper. Combine the sugar, cocoa powder, margarine, chocolate and 1 cup (250ml) water in a large saucepan over low heat. 

Cook, stirring, for 5 mins or until the margarine and chocolate melt and the mixture is smooth. Transfer to a heatproof bowl and set aside for 10 mins to cool down.
 
2. Add eggs to the chocolate mixture and whisk to combine. Sift combined flours and cocoa powder over the chocolate mixture and whisk to combine. Pour into the prepared pan.
    
3. Bake for 1 1/4 hours or until a skewer inserted in the centre comes out clean. Set aside in the pan to cool completely.   

Delicious Gluten Free Chocolate Mud Cake


4. To make caramel ganache, place the chocolate and cream in a heatproof bowl over a saucepan of simmering water (don’t let bowl touch the water). 

Stir with a metal spoon until chocolate melts and mixture is smooth. Place in the fridge, stirring occasionally, for 1 hour or until ganache thickens and is a spreadable consistency.

5. Place cake on a plate. Spread with ganache and enjoy.


 Original recipe from Coles Magazine.


Avengers Gluten Free Zebra Cake

Wednesday, 7 September 2022

Avengers Gluten Free Zebra Cake

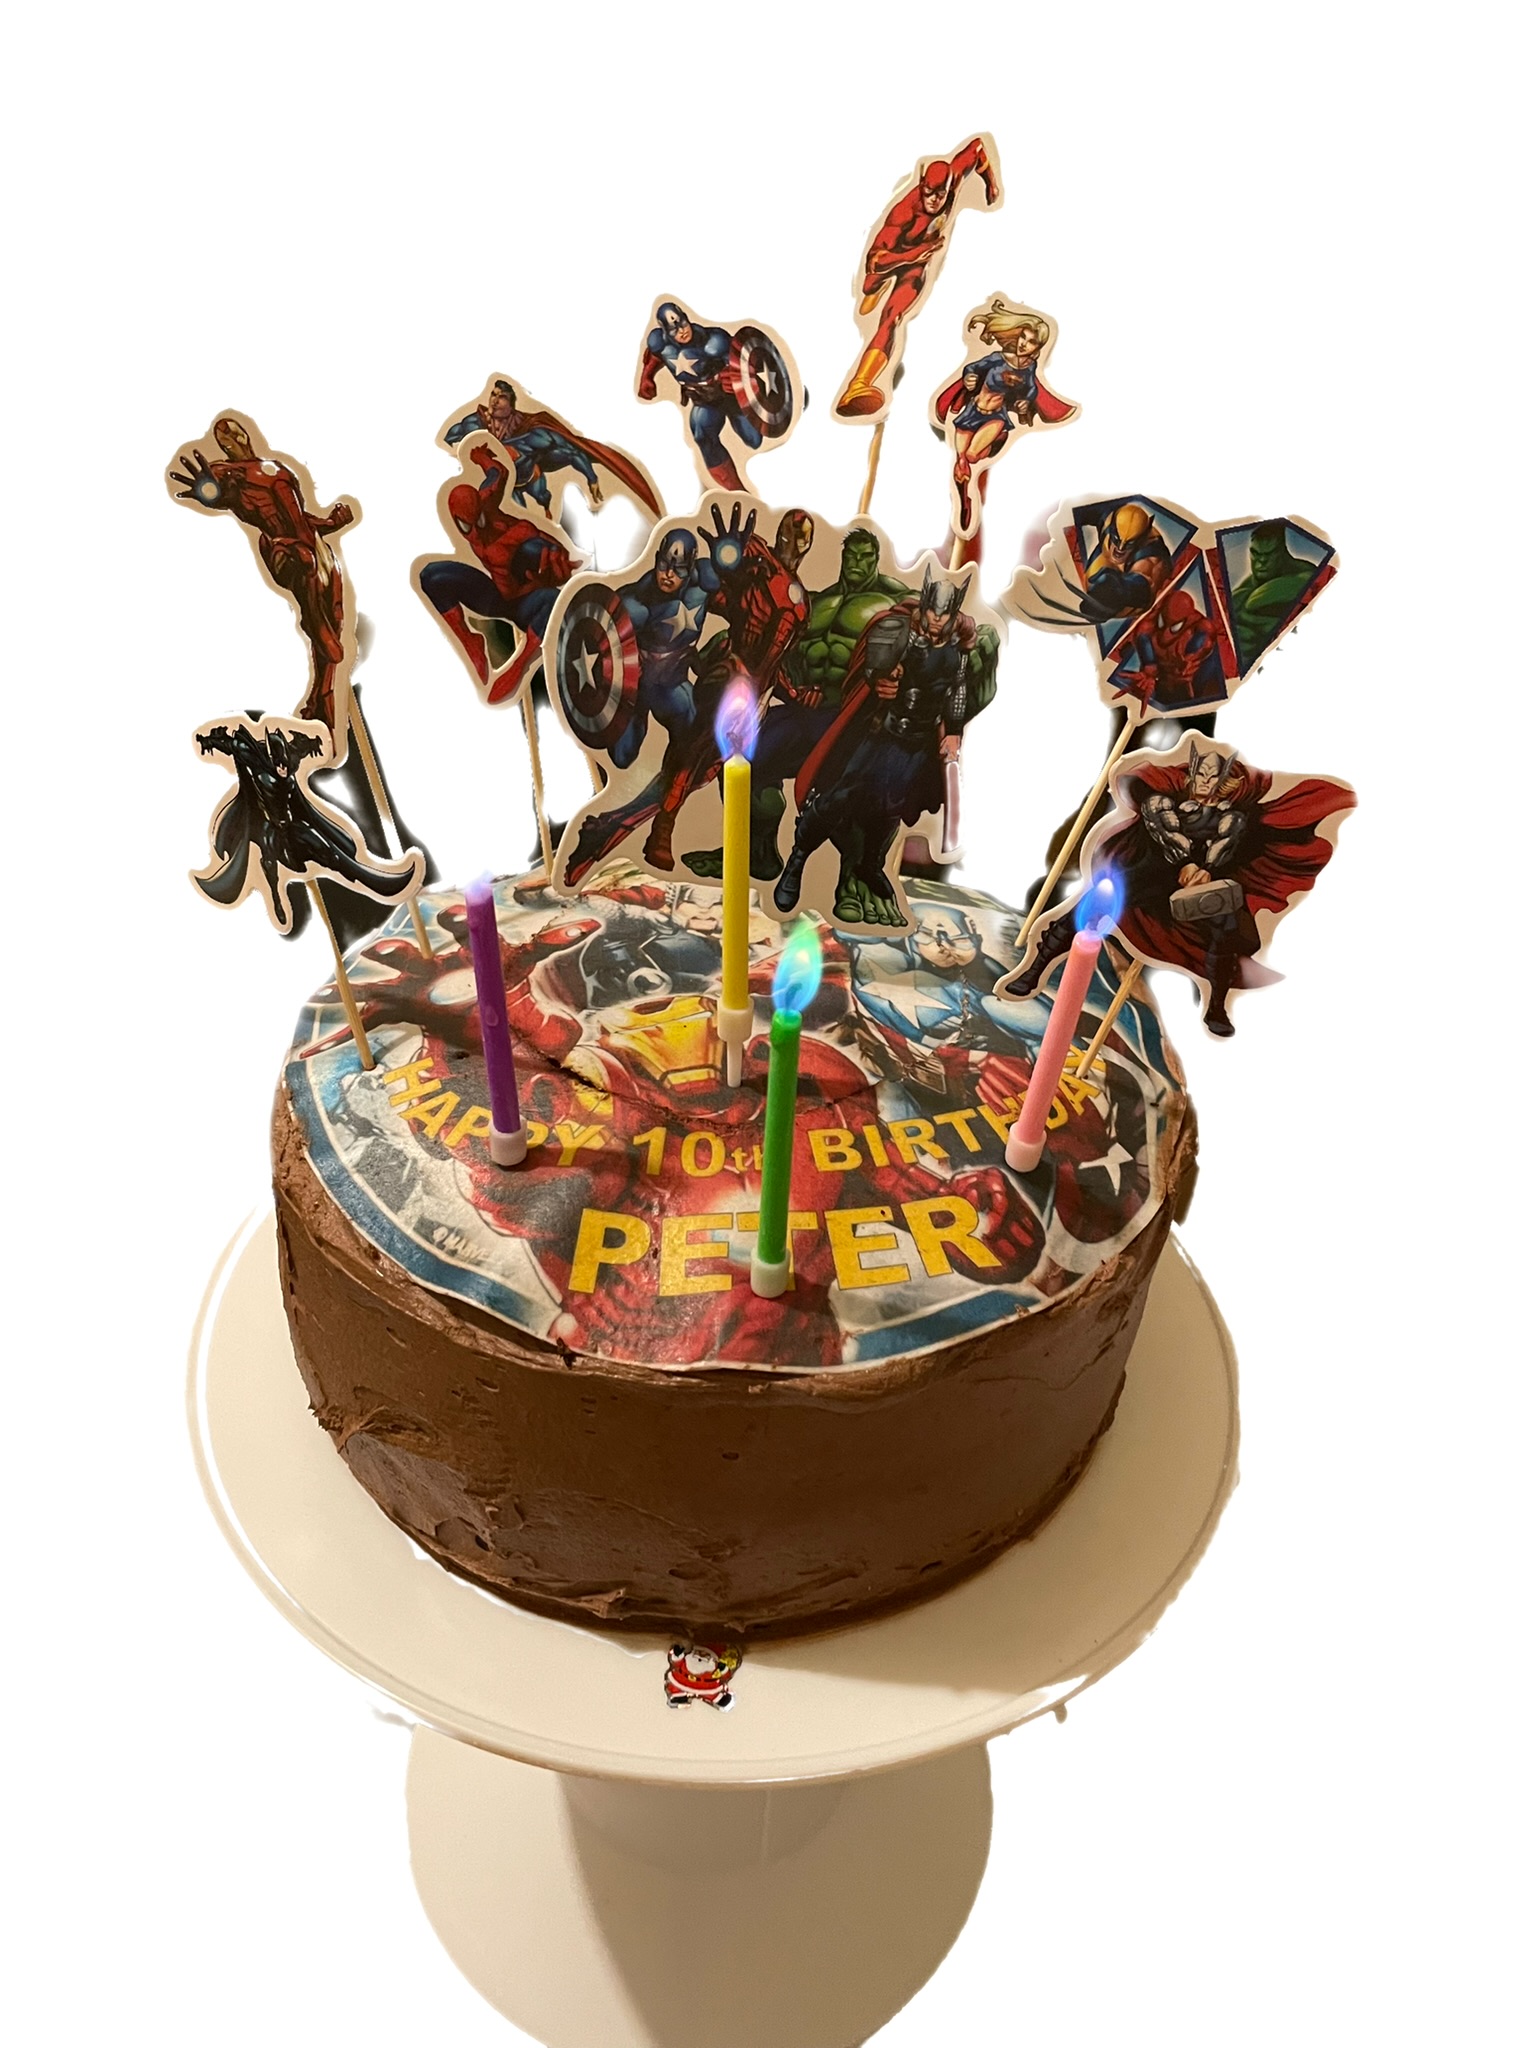
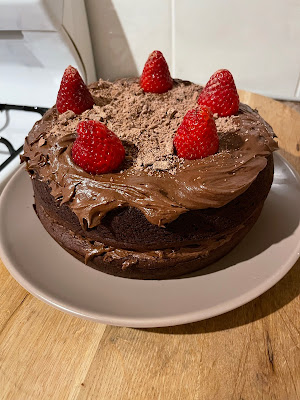
I made this gluten free Avengers zebra birthday cake for my nephews 10th birthday. I wanted to make something different so decided to mix chocolate and vanilla together. 

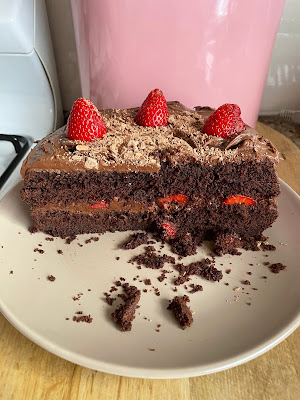
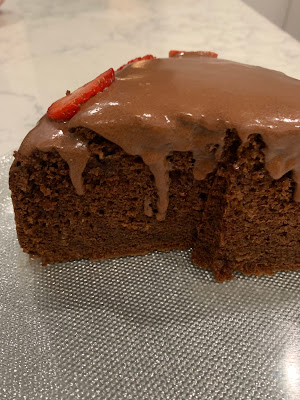
This cake did not turn out well at all inside hahaha. Somehow little rocks formed! My sister said did you put rice bubbles in here. I didn't. I don't know what happened it didn't work out but it did look good. I would love to try again especially for the icing which saved the cake because the next day it was soooo dry inside haahah.

I completely forget to photograph inside but its for the best because it looked a mess. It looked more like a chocolate cake with specks of vanilla inside. 

The Avengers flying on top of the cake and the personalised cake topper I got from eBay.

Let me know if you try it and it works!

Avengers Gluten Free Zebra Cake

Base vanilla cake batter:

1 1/4 cups (300 grams) lactose free milk or any dairy free milk, room temperature
2 tsp apple cider vinegar (to be mixed with dairy free milk)
3 2/3 cups (460 grams) gluten free plain flour
2 tsps baking powder
1 tsp baking soda
1 cup (220 grams) white sugar
3/4 cup (170 grams) flora margarine or any dairy free margarine, room temperature
3/4 cup (190 grams) mashed bananas (3 small or 2 large) or pureed applesauce, room temperature
1 tbsp vanilla extract

For the chocolate cake batter:

1/3 cup (33 grams) cocoa powder
1/4 cup (60 grams) Zymil lactose free milk or dairy free milk
2 tbsp dairy free margarine or butter, melted and cooled

Buttercream

2 cups (460 g) dairy free margarine or vegan butter, room temperature
1 cup (100 grams) sifted cocoa powder
3 cups (600 grams) sifted powdered sugar
1/4–1/3 cup dairy free milk (such as soy milk or oat milk)
 

Instructions

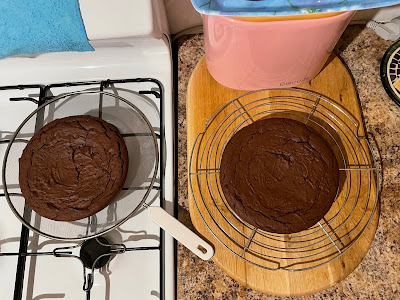
Preheat the oven to 180C/350 F. Grease two 20cm/8″ cake pans with cooking oil, and line them with baking paper/parchment paper. Set aside.

Prepare the buttermilk. Combine the milk with the apple cider vinegar, and set aside to sit for 5-6 minutes. 

In the meantime in a medium bowl, stir together the flour, baking powder, and baking soda. Set aside.

Make the vanilla batter: In a stand mixer with paddle attachment or a large bowl with hand mixer, cream together the margarine and sugar until fluffy, about 2-3 minutes. Scrape down the sides as needed. Then add in the pureed banana or applesauce and vanilla extract. 

Mix again on medium speed until combined, scraping down the sides as needed. Add in about half of the dry mixture, along with half of the buttermilk, and mix on medium speed until just combined. 

Add in the remaining dry mixture and buttermilk and mix on medium speed until there are no more dry streaks. Make sure to scrape the bottom of the bowl as well as the sides.

Make the chocolate batter: divide half of the vanilla cake batter into a separate bowl. Add in the cocoa powder, remaining dairy free milk and melted butter into one of the bowls. Stir the ingredients gently into the batter until it becomes a chocolate cake batter.

I DON'T UNDERSTAND THIS PART AT ALL BUT HERE ARE THE INSTRUCTIONS:
How to make a zebra pattern in the batter: now we’ll divide the batter into the cake pans in a zebra pattern.  Take a large spoon and spoon about 1/4 cup of vanilla batter into the middle of both cake pans. Then take another large spoon and spoon about 1/4 cup of chocolate batter directly on top of the vanilla cake batter. 

Repeat, alternating between vanilla and chocolate cake batter until the batters are finished. Gently tilt the cake pans to get the batter to touch the edges of the pan if they aren’t already. Do not tap the cake pans onto countertop. This will release any air bubbles that will help the cake rise.

Bake the cakes immediately after creating the zebra pattern. Bake for 35 - 45 minutes or until the toothpick comes out clean.

Remove from the oven and allow the cakes to cool in their pans for 10 minutes, then transfer them to a cooling rack to cool completely. Once cooled completely (there is absolutely no warmth to the touch!), then you can prepare your buttercream.

Buttercream
In a large bowl with a hand mixer, cream the butter until fluffy and light, about 2-3 minutes.

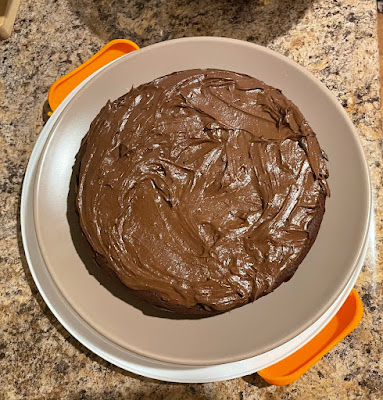
Add in the cocoa powder and 1 cup of the powdered sugar. Continue creaming the mixture, adding in the remaining icing sugar in 1 cup intervals until smooth. Add in 1-2 tbsp dairy free milk at a time to help achieve a creamy texture.

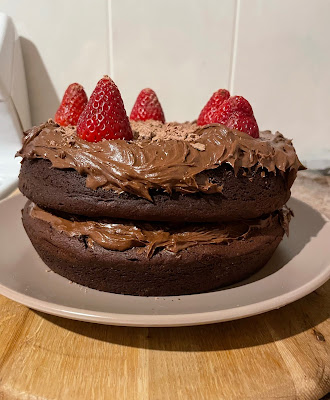
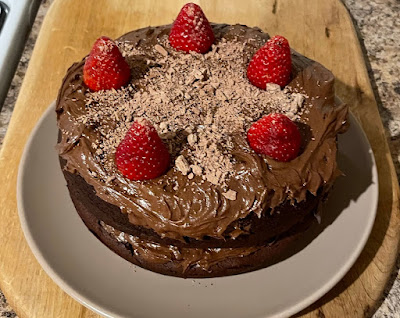
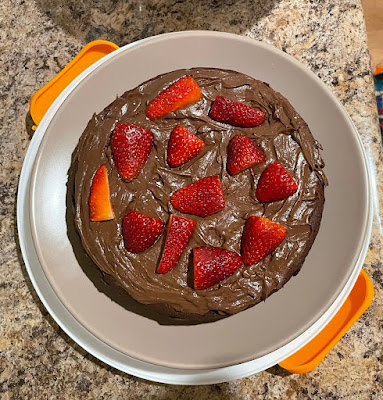
Ice the cake as desired, slice and enjoy!


The original recipe is from Banana Diaries and here is the buttercream recipe.


Decadent Jamie Oliver Gluten Free Chocolate Cake

Sunday, 12 December 2021


I was looking for a decadent gluten free birthday cake for my sister's birthday. She always has two. One for immediate family and the other for both parents, ours and her in laws. 

So this year being such a yucky year I decided to make a selfishly decadent gluten free cake which can also be a vegan cake all thanks to Jamie Oliver. 

The only reason it is a gluten free chocolate cake and not a vegan chocolate cake is because I accidentally got lactose free yoghurt, I swear I thought it was soy and I used normally margarine because I thought it would come out better.  

I will leave experimenting up to you. Either way this cake is ridiculously decadent and delicious. 

Enjoy.  


Decadent Jamie Oliver Gluten Free Chocolate Cake

Ingredients
300 g margarine (substitute dairy-free margarine suitable for baking) , plus extra for greasing
300 g gluten-free plain flour
300 g caster sugar
2 teaspoons vanilla extract
200 g lactose free yogurt  (substitute soy yogurt)
2 teaspoons gluten-free baking powder
70 g cocoa powder
6 tablespoons rice milk
100 g fresh strawberries
dairy-free dark chocolate (70% cocoa solids), to serve

Icing
200 g icing sugar
4 tablespoons cocoa powder
100g margarine (substitute dairy-free margarine)
2 tablespoons lactose free yoghurt (substitute organic soy yoghurt)


Method

Preheat oven to 190ºC/375ºF/gas 5. Grease two 20cm/8"inch cake tins with margarine, then line the bottom with baking paper and dust the sides with gluten-free flour.

In a bowl, beat the margarine and sugar for around 5 minutes, or until light and fluffy. Add the vanilla extract and yoghurt, then mix until combined.

Sift the flour, baking powder and cocoa powder into the bowl, then fold through. Add the rice milk and stir briefly until you have a nice, smooth batter.

Carefully divide batter between the cake tins, then place on the middle shelf of the hot oven for 45 minutes (SEE BELOW), or until an inserted skewer comes out clean. 

(The original recipe calls for 20-25 minutes but the cakes were raw! I actually cooked the cakes for 50 minutes but they came out a little dry so go for 40-45 minutes. The cakes need to be a little fudgy so a little raw. They will cook a little more as they cool down. A fudgy cake is nice to eat! Skewer doesn't need to come out clean. Experiment! )

Leave to cool for 5 minutes, before turning the cakes out onto a wire cooling rack, then leave to cool completely while you make the icing.

Sift the icing sugar and cocoa powder into a large bowl, then add the margarine and beat until smooth. Stir in the yoghurt to combine.

Once cooled, place one of the sponges on a plate or cake stand. Carefully spread half the butter icing on top.

 then scatter over most of the strawberries. 

Sandwich the second sponge on top and press down lightly, then carefully spread the remaining icing over the top and finish with a scattering of strawberries and a few shavings of chocolate. I used a small flake. 


Find the original Jamie Oliver Vegan Chocolate Cake Recipe Here


Green Gluten Free Chocolate Birthday Cake

Thursday, 16 September 2021


Gluten Free Chocolate Birthday Cake

I made this gluten free chocolate cake for my nephews 9th birthday.  He loves dinosaurs so I added some green food colouring and chocolate dinosaurs. 

The dinosaurs I made myself. I bought a chocolate mold with dinosaurs and just melted some chocolate and out popped the dinosaurs. I also made the stars too and added some hundreds and thousands.

With the dinosaurs I made some with white chocolate and added some food colouring to it.  I filled them with caramel which he loves too. 

I went out of my way to watch some YouTube videos which showed me how to do this and he didn't like the taste of the chocolate or the caramel inside. Well that is the last time I go out of my way! hahahaha. 


 Gluten Free Chocolate Birthday Cake

1 ½ cups white granulated sugar
2 cups plain gluten-free flour  
¾ cup cocoa powder    
1 ½ teaspoons gluten-free baking powder    
1 ½ teaspoons (8g) bi-card soda/baking soda
1 teaspoon salt
2 large eggs (110g), room temperature
1 cup lactose free milk (or dairy-free milk)
½ cup vegetable oil (or oil of choice)
1 ½ teaspoons gluten-free vanilla extract
¾ cup boiling water (for activating the cocoa)

For the icing:
½ cup 115g margarine (or dairy-free butter)
1 ½ teaspoons gluten-free vanilla extract
4 ½ cups icing sugar/powdered sugar
¼ cup lactose free milk (or dairy-free milk)

Centre of cake
1 cup Nestle Caramel Top N Fill
1 cup of icing sugar mixture from above


Instructions

Preheat oven to 180°C (350°F).  Grease a 25cm/10 inch silicone cake mold in the shape of number 9.

In a large mixing bowl, stir together sugar, flour, cocoa, baking powder, bi-carb of soda and salt until they are smooth and combined.

In a medium sized bowl mix together eggs, milk, oil, and vanilla. 

Pour the wet ingredients into the dry ingredients and beat with a mixer on medium speed for a few minutes.

Stir in boiling water. ( I forgot this step!)

Spoon into silicone mold. Place mold onto a baking try and into oven and bake for 45-50 minutes checking a few times towards the end in case cake burns. 

If you find the cake is burning on top but is not cooked inside cover with foil and place on bottom rack. Once a toothpick inserted in the center comes out clean remove from oven and let cool in the pan for then remove from pan and let cool on a rack.


Centre of Cake

I sliced the cake in half and on one side I buttered with icing sugar and on the other side I buttered with caramel sauce then I sandwiched together. One side did break in half but that is ok because once you ice the cake you won't know the difference! Looks brand new.   


For the icing

In a medium mixing bowl, beat margarine and vanilla until smooth and creamy. Gradually add icing sugar, one cup at a time. Slowly beat in milk. Add a drop of green food colouring.

Beat in additional milk and margarine if needed, to obtain desired consistency.   

Enjoy!


Original recipe is from Gluten Free Palate


Chocolate & Orange Heart Shaped Gluten Free Cake

Thursday, 28 May 2020


Yummy Made From Scratch Gluten Free Chocolate Cake

Jamie Oliver Gluten Free Chocolate Cake Recipe

Half a heart gluten free chocolate cake recipe


I saw Jamie Oliver make this gluten free chocolate cake last week and just loved the heart shape so went out and bought the tin and set about making it.

It is a very easy gluten free chocolate cake to make and you can also change the flour to normal flour too.

This isn't a dairy free recipe unfortunately. I find that cakes need fat from the butter or margarine so dairy free margarine just doesn't work. You will end up with a custard cake if you use dairy free unfortunately. I used Flora Plant Based Lightly Salted Butter but won't be doing that again because it didn't agree with my stomach. My usual go to is olive oil based margarine so next time I will use that. In the ingredients I have stated margarine but use what you feel is best for you.

My seven year old nephew helped me make this, he beat in all the eggs then folded in the mixture. It was quite lumpy but we smoothed it out a little more and in the oven it went.

I highly recommend you use the orange to give it that jaffa flavour. It was absolute divine as it gave it that hint of orange flavour. Helps even more if the orange is from the orange tree in your backyard it was perfection.

For the icing Jamie was very decadent and used another block of chocolate and another block of butter but that was way too many calories my hips didn't need so I just made my own icing with icing sugar and cocoa.

Sorry about the photos but I forgot to take a picture before we cut the cake so you get half the cake and a picture of the icing oozing over the sides!


Chocolate & Orange Heart Shaped Gluten Free Cake

Ingredients

200 g margarine, plus extra for greasing
200 g caster sugar
200 g dark chocolate 
200 g gluten-free self-raising flour, plus extra for dusting
6 large free-range eggs
2 teaspoons vanilla bean paste
1 small orange
strawberries to decorate, optional
   
ICING
200 g icing sugar
2 tablespoons cocoa powder
2 tablespoons margarine
1/4 cup water

Method
1. Preheat the oven to 180ºC/356ºF/gas 4. Jamie's original recipe called for 160C but that is too low as we had it 160C fan forced and had to turn it up after 50 minutes. So start with temperatures I have chosen above.

2. Place the margarine in a heatproof bowl with the sugar. Chop up the chocolate and add to the bowl.

3. Position the bowl over a pan of gently simmering water, making sure the water doesn’t touch the base of the bowl. Leave this for a few minutes until the chocolate mixture has melted and combined, stirring occasionally.

4. Meanwhile, grease a 22cm loose-bottomed cake tin with margarine and line with baking paper. If you don’t have any paper, add a tablespoon of plain flour to the tin and shake it around until you’ve got an even layer, then turn the tin upside-down and tap to remove any excess.

5. Pour the melted chocolate mixture into a larger mixing bowl and leave that to cool for 5-10 minutes.

6. Whisk in the eggs one at a time.  Add the vanilla bean paste and zest from one small orange, then sift in the flour.

7. Gently fold the flour into the chocolate mixture until just combined. Do not over mix. Pour the mixture into your prepared tin and bake for 40 to 50 minutes, or until the cake is springy to the touch, and a skewer inserted in the middle comes out clean.

8. Leave the cake to cool in the tin for 10 minutes, then transfer to a wire rack to cool completely. Sometimes it sags in the middle as it cools, but don’t worry – either trim the top, or fill it with fruit and extra icing!

9. To make the icing sift the icing sugar and cocoa into a bowl and stir until combined. Then slowly add water and margarine and mix until you have a smooth mixture.

12. Decorate as you please. I used some strawberries.

Original gluten free chocolate cake recipe by Jamie Oliver

Gluten Free Orange Chocolate Chunk Cake

Wednesday, 26 February 2020


This gorgeous gluten free Orange Chocolate Chunk Cake came from the gorgeous Greek celebrity chef Akis Petretzikis.

Akis made his gluten free cake with normal flour and white chocolate but I changed it to suit my diet and what I had in the house hahaha. You would never guess the difference it tastes amazing.

This is incredible fresh out of the oven. If possible serve straight away. Once it cools it turns to a solid cake and can be a little heavy on the tummy but it is still delicious.

Also for some reason I made almost double what he did. I had to put it in a large round tin as my loaf tins were all too small. Not sure how it happened but I was glad for it as it is a delcious cake and we all woofed it down.

Kali Orexi!

Gluten Free Orange Chocolate Chunk Cake


Ingredients
350 g oranges around 2 smallish oranges
300 g caster suagr
200 g sunflower oil
3 eggs, medium
1 teaspoon vanilla extract
300 g plain gluten free flour
1 tablespoon gluten free baking powder
1 pinch salt
180 g baking milk chocolate

Method
In a saucepan with boiling water add the oranges and simmer covered with the lid for 1 hour.

Chop up the chocolate into chunks and set aside.

Preheat the oven to 170C (340F) set to fan.

While hot cut the oranges in half, remove the seeds and put them in a blender. Beat very well until they become a paste.

Add the paste into a bowl then add the sugar and sunflower oil and whisk.

Add the eggs and vanilla and mix well.

In another bowl add the flour, baking powder, salt, chocolate pieces and mix.

Transfer the solid ingredients to the bowl with the wet ingredients and mix with a silicone spatula.

As I said above I found I made a whole lot more than Akis did so if you find you have a large amount of batter pour into a greased and floured 20cm/8inch round cake tin and bake for 90 min. Keep a close eye on it for the last 30 min checking every 15 min.

If you have a smaller amount of batter pour into a greased and floured 10x35cm (4"x14"inch) loaf tin and bake for 40-45 minutes.


Dust with icing sugar and serve.


Original recipe can be found here

Gluten Free Chocolate Fudge Bundt Cake

Sunday, 22 December 2019

Christmas Gluten Free Chocolate Fudge Bundt Cake


 Christmas Gluten Free Chocolate Fudge Bundt Cake Recipe

 Christmas Cake Gluten Free Chocolate Fudge Bundt Cake

 Gluten Free Chocolate Fudge Bundt Cake Inside

I wanted to make a gluten free chocolate cake with a bundt tin and found this divine gluten free chocolate bundt cake recipe after doing a search.

Of course I changed some ingredients and added the icing and decorations. I needed a gluten free chocolate cake for a Christmas party I was going to and found this chocolate bundt cake recipe.

At this party two other people were on a gluten free diet as well so three of us needed to be satisfied and satisfied we were.

This gluten free chocolate bundt cake got rave reviews from one of the teenage boys who was at the party and he ended up having two slices much to my delight.

He said it was MasterChef quality and wouldn't stop raving about the cake all night and asked me to make it for the New Years party which I will do gladly.

I was told to make sure to get a New Years topper though don't use the Christmas one. Hahahah boys are funny.

This was a hit. So easy to make and total fool proof!

Enjoy.

Gluten Free Chocolate Fudge Bundt Cake


Ingredients
1 1/2 cups caster sugar
1 3/4 cups plain gluten free flour
3/4 cup baking cocoa
2 teaspoons baking soda
1 teaspoon gluten-free baking powder
1 teaspoon salt
2 large eggs, room temperature
1 cup lactose free or dairy-free yogurt
1/2 cup light olive oil
1 teaspoon gluten free vanilla extract
1 cup hot water
½ cup chocolate chips

Icing
1 1/2 cups icing sugar sifted
1/4 cup margarine with olive oil
1/3 cup water

Instructions
Preheat oven to 350°F/180C. Grease a 10-inch/25cm Bundt cake pan; set aside.

In a large bowl, combine sugar, flour, cocoa, baking soda, baking powder, and salt.

In a separate bowl combine the eggs, yoghurt, oil and vanilla until combined.


Then add wet ingredients to the dry ingredients and beat on medium speed for 2 minutes.

Add hot water and stir until combined.

Stir in chocolate chips.

Pour into pan.

Bake for 60 - 75 minutes or until top is firm but still moist inside. Since this is a fudge cake inserted a toothpick is not appropriate as it will come out wet.

Cool in pan for 10 minutes before removing from pan to a wire rack.

Once cake is cooled make icing sugar.


NOTE: I made up the icing sugar recipe as I went along so I didn't measure anything. You need a somewhat thick consistency so start with a little of each ingredient until you get the correct consistency. So a little icing sugar than margarine than water.

Once you have correct consistency spoon gently over cake until covered as above.

The stars were bought from Woolworths supermarket in the baking aisle. So look out for a box of stars. The Christmas decoration I got from eBay but I am sure you can find in any good baking store. Store in an airtight refrigerate until ready to serve.


Original recipe from the Gluten Free Palate

Gluten Free Chocolate Coconut Cake

Monday, 29 July 2019


gluten free chocolate coconut birthday cake


 gluten free chocolate coconut cake


gluten chocolate cake recipes from scratch


homemade gluten free chocolate cake

I found this Gluten Free Chocolate Coconut Cake recipe in the July issue of the Woollies magazine. The cake in the original recipe is chocolate but I thought that was overkill so removed the cocoa and added vanilla essence and a little extra flour.

The original recipe is called a Coconut Rough Cake which was not gluten free and I found the amount of ingredients asked for in the recipe were exaggerated! I had massive amounts of icing left over even though I was very generous in coating the cake, because of this I halved some of the ingredients. 

A mistake I made was using extra large eggs so the cake came out like a custard. It's like three layers of vanilla slice! I am not sure what the consistency of this cake is suppose to be but I don't think it's bready its more eggy. I think if you love vanilla slice then you will love this cake! Please let me know if you get different results.

Please note it did take me two days to make. It is time intensive. I made the cake and ganache one day and the rest of the icing then put it together the next day.

Gluten Free Chocolate Coconut Cake 

Chocolate Coconut Cake
600gm Gluten Free plain flour
600gm caster sugar
450ml water
2 teaspoons vanilla essence
3 tsp gluten free baking powder
2 cups McKenzie's Moist Coconut Flakes
9 free range eggs, lightly beaten
3 x 400ml cans coconut milk
1 tsp salt

Ganache filling
2 x 225 pkts milk chocolate melts
2/3 cup Zymil lactose free thickened cream

Buttercream Icing
250gm Nuttelex dairy free margarine at room temperature
500gm icing sugar
1 1/2 tbs baking cocoa
4 tablespoons thickened cream

Milk Chocolate Drip
150gm chocolate milk melts
3 tablespoons Zymil lactose free thickened cream

Method
1. Preheat oven to 170C. Grease 3 x 20cm round cake tins and line with baking paper.

2. To make chocolate coconut cake, in a very large bowl combine dry ingredients with 1 tsp salt.

3. In a massively large bowl (mine was 35cm in diameter) combine coconut milk, eggs and 450ml water. Note: I found the coconut fat was solid when I opened the cans so emptied the three cans first into the bowl then beat them with an electric mixer until smooth. Then I added other ingredients and beat them all together until combined.

4. Add dry ingredients to wet ingredients and whisk until combined.

5. Divide batter between baking tins and bake for 60-90mins. I found the top two tins baked quicker than the one on the bottom shelf. The cake on bottom shelf needed an extra 15-20 minutes.Set aside to cool completely then trim tops to level cakes.

6. To make ganache filling place chocolate in a heatproof bowl. heat cream until just about to boil then pour over chocolate. Stir until chocolate is melted and refrigerate for about 20 minutes or until thick and spreadable.

7. To make buttercream icing beat margarine with a salt until pale about 3 minutes. Add icing sugar a little at a time and mix until fully incorporated. Divide mixture into three bowls add a little more to the last bowl. To make the darkest coloured icing add 1 tbspoon cocoa powder and 1 tbspn cream. To make medium coloured icing stir in 1/2 tbspoons cocoa powder and 1 tbspoon cream. For lightest coloured icing with extra mixture add two tbspoons cream and stir to combine.

8. To assemble cake sandwich layers with ganache.

9. Coat cake with some of the light coloured icing and refrigerate for 20 minutes or until set.

10. With the flat side of a butter knife coat the bottom calf of the cake with darkest buttercream. Then work your way up the cake with medium and light coloured cream until all cake is coated.

11. To make chocolate drip, place chocolate and cream in a heat poof bowl on the stove top over low heat until chocolate has melted and both ingredients have combined. Transfer mixture to a piping bag or zip lock bag with corner snipped and run around the top edge of cake creating lots of drips. Fill in top of cake with remaining chocolate sauce.


Nigella's Gluten Free Dark and Sumptuous Vegan Chocolate Cake

Saturday, 29 June 2019

Nigellas Gluten Free Dark and Sumptuous Chocolate Cake


Nigella's Gluten Free Dark and Sumptuous Vegan Chocolate Cake


Nigellas Gluten Free Dark and Sumptuous Chocolate Cake Slice

Nigellas Gluten Free Dark and Sumptuous Chocolate Cake Sliced

This is a cake recipe I saw Nigella tweet but I lamented that it was not gluten free and to my surprise Nigella responded and suggested I try it gluten free so here we are.

I came to my friend Helen's house and with the help of her daughter Chloe as well we made this gluten free version. I am not a fan of coffee so we took that out but you can put it in. I also couldn't find edible rose petals so am using freeze dried strawberries which I found in one of my breakfast cereals!

Coconut butter is impossible to find so here is the recipe for coconut butter I used to make it. 

Nigella's Gluten Free Dark and Sumptuous Chocolate Cake

Ingredients

For the icing
60 millilitres cold water
75 grams coconut butter (recipe link above)
50 grams soft brown sugar
1½ tablespoons cocoa
150 grams dark chocolate (min. 40% cocoa solids), finely chopped

For the cake
225 grams plain flour
1½ teaspoons bicarbonate of soda
½ teaspoon fine sea salt
75 grams cocoa
300 grams soft brown sugar
375 millilitres hot water from a recently boiled kettle
75 grams coconut oil (90ml)
1½ teaspoons cider vinegar or white wine vinegar
1 tablespoon freeze dried starwberries
1 tablespoon chopped pistachios

Method
Preheat the oven to 180C/160C Fan/Gas 4 then grease and line a round 20cm/8in cake tin. Make sure to line well if you are using a springform tin as this is a very wet batter.

Start with the icing.

Place all the ingredients for the icing except the chopped chocolate into a small heavy based saucepan and bring to the boil. Make sure everything’s dissolved. Turn off the heat, but leave the pan on the stove top and quickly add the finely chopped chocolate making sure it all melts together. Leave for a minute, then stir until you have a dark glossy icing. Leave to cool. Make sure to give the icing a stir with a spatula every now and again.


Put the flour, bicarb, salt and cocoa in a mixing bowl and use to fork to give it a good mix. (As shown above with my excellent helper Chloe, 7)

Combine the sugar, water, coconut oil and vinegar until the coconut oil has melted, and stir into the dry ingredients. Once combined use an electric hand mixer on medium speed to get rid of any lumps. Next pour into the prepared tin and bake for 35 minutes but check at the 30-minute mark to see if it is already done.

When it's ready, the cake will be coming away from the edges of the tin and a cake tester will come out clean, apart from a few crumbs. This is a fudgy cake and you don't want to overdo it.

Once the cake is cooked, transfer the tin to a wire cooling rack and let the cake cool in its tin.


Give the icing a good stir with the spatula to check it's at the right consistency then turn the cake out of the tin and cover with icing, just like Helen is doing above.

It needs to be runny enough to cover the cake, but thick enough to stay (mostly) on top. If you are using a springform tin pour over the unmoulded cake, and use a spatula to ease the icing to the edges, if you need to.

Sprinkle with strawberries and chopped pistachios or anything else that your heart desires; otherwise, you can leave it as is, gleaming darkly.

Slice and enjoy.


Original recipe is here

Gluten Free Chocolate Peanut Butter Marshmallow Cake

Monday, 17 June 2019


Gluten Free Choclate Peanut Butter Marshmallow Cake Slice


Gluten Free Chocolate Peanut Butter Marshmallow Cake Inside

 
 Gluten Free Chocolate Peanut Butter Marshmallow Cake Inside Close Up


Gluten Free Chocolate Peanut Butter Marshmallow Cake Batter


 Gluten Free Chocolate Peanut Butter Marshmallow Cake

This divine gluten free Chocolate Peanut Butter Marshmallow Cake is from the current Wollies mag. I made the cake gluten free and changed a few of the ingredients as well as the name. In the magazine it is called a gooey pudding but I didn't like that title so I changed it.

I can't go past a cake with marshmallows, they are my favourite. I didn't use gluten free marshmallows but if you are really sensitive please feel free to use them.

I also found the pink ones gave a lovely starwberry flavour which was divine so definitely use a bit of both. If you love a strawberry flavour with you chocolate then use all strawberry marshmallows.

This gluten free chocolate cake is best warm. If you put it in fridge and then decide to serve it, it gets a bit hard because the marshmallows go back to their natural state.

So for the best experience heat up add a few spoonfuls of almond milk ice cream and you will be in heaven.

Enjoy.

Gluten Free Chocolate Peanut Butter Marshmallow Cake


Cake Method
200g vegetable margarine
180g 40% cocoa dark chocolate, chopped
3 free range eggs
2/3 cup caster sugar
1/3 cup crunchy peanut butter
1 cup gluten free self-raising flour, sifted
15 white and pink marshmallows


Topping
1/3 cup boiling water
1 tbs cocoa
1 tbs caster sugar


1. Preheat oven to 200°c. Grease a 20cm cake tin and line base and sides with baking paper, making sure the paper extends above the cake tin.

2. Place margarine and chocolate in a microwave-safe bowl and heat on high for 1 minute. Stir and repeat until melted and smooth.

3. Whisk eggs, sugar and peanut butter in another bowl then pour chocolate mixture into egg mixture and stir to combine.

4. Add flour and stir until smooth.

5. Fold in 10 marshmallows (or a few more hahaha). Transfer batter to cake tin and top with remaining marshmallows.

6. Combine topping ingredients in a bowl. Pour over cake batter. Then add additional 5 marshmallows on top.

7. Bake for 20 minutes on high so a crust forms then reduce oven to 150°c and cook for a further 1 hour or until slightly firm on top and gooey in the centre. Stand for a few minutes then serve immediately.

To serve, top with ice-cream and wolf down hahaha


Original recipe here.

Gluten Free Chocolate Cake with Maple Butter Syrup

Saturday, 6 August 2016


Gluten Free Chocolate Cake with Maple Butter Syrup

Gluten Free Chocolate Cake Recipe with Maple Butter Syrup

Gluten Free Chocolate Cake

Easy Gluten Free Chocolate Cake Recipe

Gluten Free Chocolate Cake with Maple Butter Syrup


This Gluten Free Chocolate Cake is an adaptation of two Donna Hay recipes. Is is really easy to make and will disappear very quickly.

You can make the cake the day before then make the syrup the day of your event and pour on just before serving to salivating friends and family.

Gluten Free Chocolate Cake

110g lactose free margarine
1 cup brown caster sugar
1 teaspoon vanilla extract
2 eggs
1 cup gluten free plain flour, sifted
1/4 cup premium dutch cocoa, sifted
1 teaspoon baking powder
1/2 cup lactose free milk

Maple Butter Syrup

1/2 cup maple syrup
2 tablespoons lactose free margarine


Method for Gluten Free Chocolate Cake and Maple Butter Syrup

Preheat oven to 160°C/320F.

Put the margarine, sugar and vanilla in the bowl of an electric mixer and beat for at least 10–12 minutes.

Add the eggs one at a time and beat well, scraping down the sides of the bowl.

Next add the flour, cocoa, baking powder and milk and beat until just combined.

Pour the mixture into a greased 20cm/8inch cake tin lined with non-stick baking paper and cook for 40–50 minutes or until cooked when tested with a skewer.

Allow to cool before plating.

Place the maple syrup and margarine in a small saucepan over medium heat and stir until all ingredients are well combined and smooth. Pour the syrup over the warm cake and serve. Serves 8–10.


Notes
Make sure to beat the margarine and sugar together for at least 10 minutes. This way you will get a lighter, fluffier cake. 

Poke holes in the cake before you pour the syrup. This way the cake will absorb the syrup better.


Gluten Free Black Forest Roulade

Monday, 18 January 2016


Gluten Free Black Forest Roulade
Slice of Gluten Free Black Forest Roulade


I found this delicious gluten free Black Forest Roulade recipe from one of the Woolies Fresh Magazines. I would love to say it is lactose free but it isn't.

I have yet to master getting thick cream from cans of coconut cream. I have tried several times to put coconut cream in the fridge but the cream is not hard enough so is of no use. Plus you would need about 8 cans to get enough cream to make this recipe.

I was going to use the lactose free cream but it says not suitable for whipping so there goes that idea. It would be nice if someone could make a lactose free cream that you can whip then I would definitely use it.

Since you are only have a slice or two of this, there won't be a lot of cream in there so we will just have to suffer a little for a glorious piece of roulade.


Black Forest Roulade

Ingredients

5 eggs, separated
2/3 cup raw caster sugar
225g dark choc melts, melted, cooled
2 tbs sifted icing sugar,
2 tbs sifted cocoa powder
200g cherries, pitted, halved
300ml cream

Method

1. Preheat oven to 180°c. Line a 25 x 35cm baking tray with baking paper.

2. Beat egg yolk and sugar with electric beaters until thick and pale. ( Do not overbeat because then your roulade will become too soggy and will crack when you roll it out like mine did!)

3. Gently fold in melted chocolate.

4. In a clean bowl and with clean beaters, beat egg white until stiff peaks form. Gently fold into chocolate mixture in two batches. Spoon into pan and spread evenly.

Bake for 12-15 minutes or until set. Take out of oven and place a layer of baking paper over the top so roulade doesn't dry out while you wait for it to cool. Give it about 15 minutes. Cut another piece of baking paper a little larger than the baking tray and place on bench.

5. Once cool sprinkle the top of the roulade with icing sugar. Place the baking paper back on top. Then get a new tray around the same size as the baking tray with the roulade and flip roulade onto new tray then slide onto baking paper on bench. 

 6. Gently peel off the bottom layer of the roulade then roll it gently but tightly from the shortest end which is the one measuring 25cm.
 
Rolled Up Gluten Free Black Forest Roulade

 Leave to cool to room temperature.
 
Cooling Gluten Free Black Forest Roulade

 7. Next whip cream and icing sugar together until thick. When cake is cool, gently unroll. If you see any crack don't worry about it as you will cover it up with the icing sugar.

Gluten Free Black Forest Roulade with Cream

Spread with cream covering the curliest end from the edge which will be your centre but leaving a 1cm gap around all other edges so cream doesn't spill out when you roll it up.


8.Then top with cherries.
Gluten Free Black Forest Roulade with Cherries

Re-roll, dust with all over with cocoa powder and transfer to a serving plate.

Gluten Free Black Forest Roulade Whole


Nutritional information
Per Serve:
6.5g protein
27g fat (18g saturated fat)
45gm carb
0.5gm dietary fibre
1850 kj (440cals)


Related Posts Plugin for WordPress, Blogger...

Sia's Cooking Blog Designed by Ipietoon Blogger Template